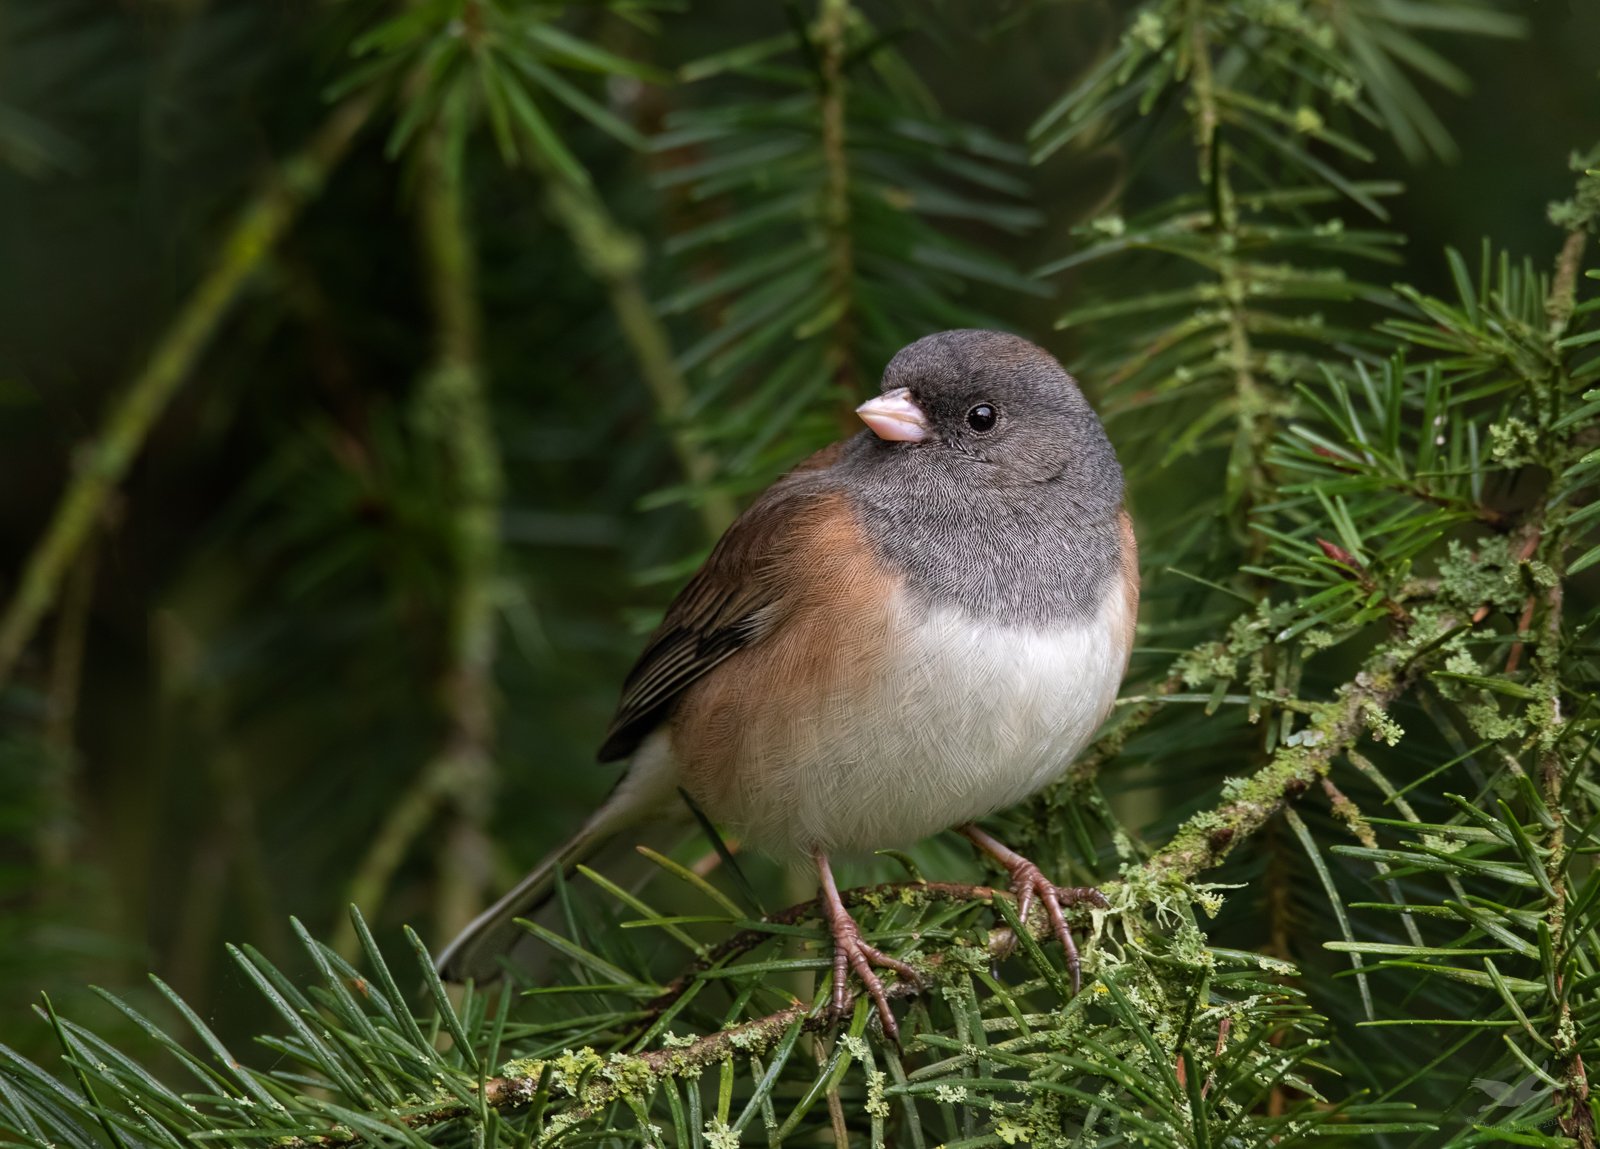
Another bird buried in a Douglas fir. I liked the head turn here and all the moss on the branches. I burned the left side a bit to minimize the distraction of those three upward pointing branches. I tried two or three different ways of handling them and this seemed to work the best.
The frame with this head turn was rather short of canvas on the left, so I stole a continuation on that side from two frames later. Even that close and using identical white balance and exposure adjustments in LR there was a slight difference in the two sections that I blended out. Do you see any anomalies?
What artistic feedback would you like if any?
Did the burn work? Any issues with the composition?
Any pertinent technical details:
7DII, Sigma 150-600 C @ 600 mm, gimbal head mounted to blind, f/8, 1/80, iso 1000, manual exposure. Processed in LR & PS CC. Arbitrary crop proportions. Final size is 17 MP. Taken yesterday at 9:28 am.
You may only download this image to demonstrate post-processing techniques.
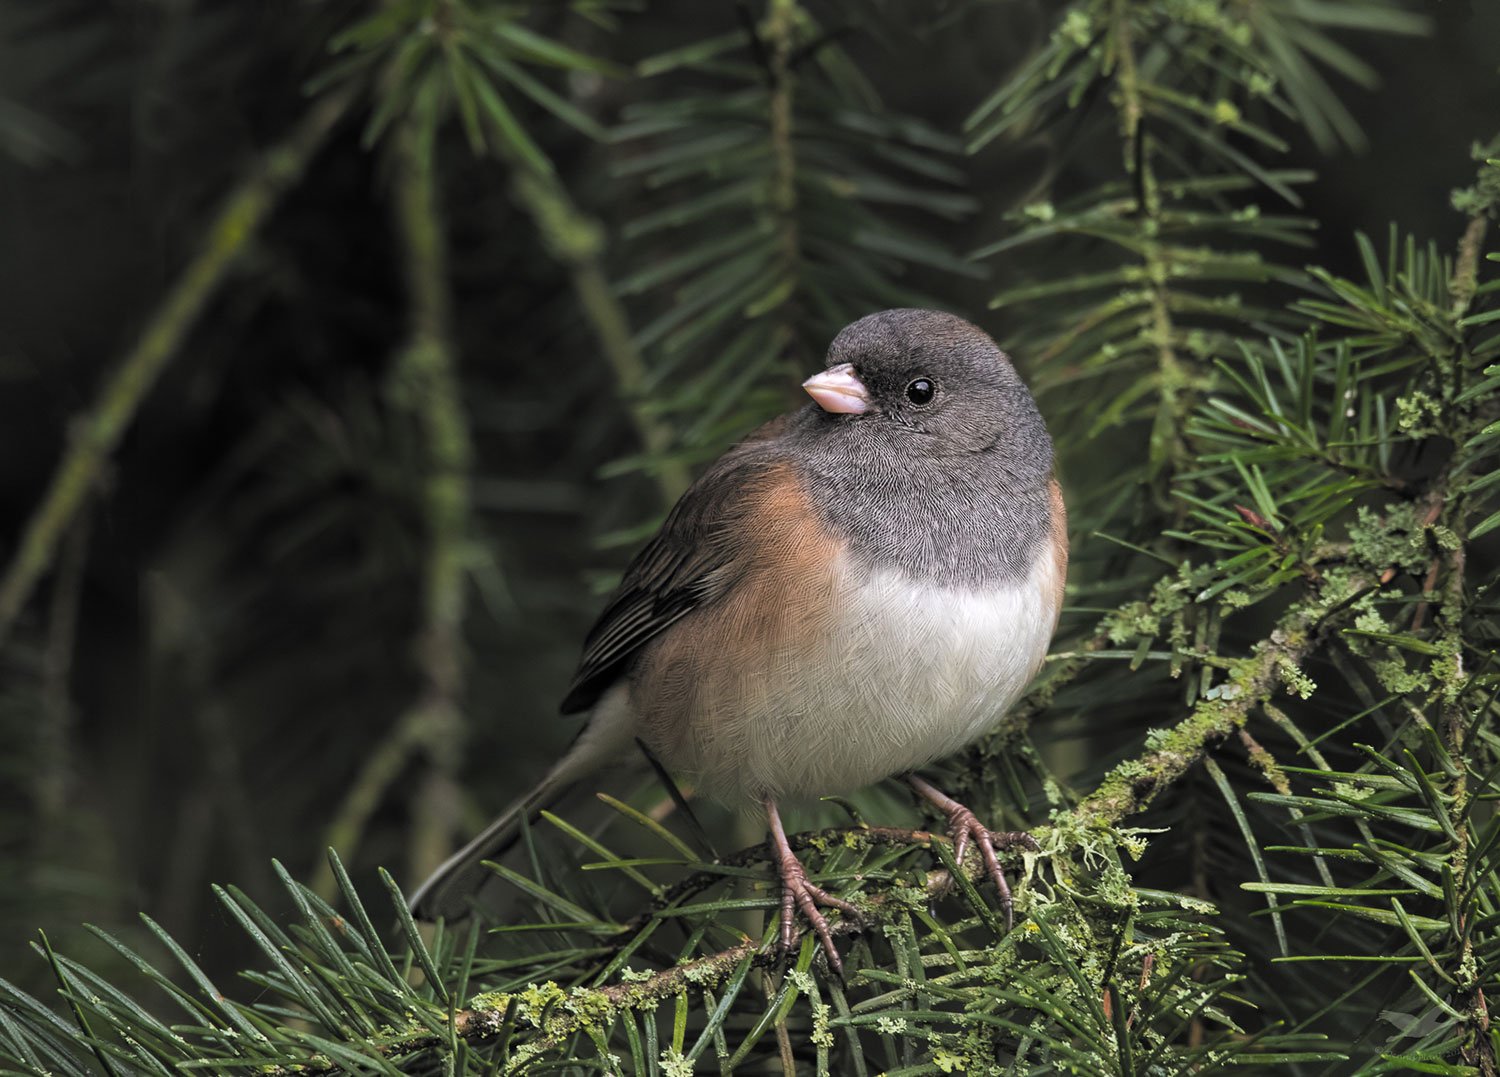
The color contamination in the blacks still exists in this image. I could tell right away because the birds back feathers up towards the head have a red cast in them and we know the feathers are supposed to black. Those crazy northwest saturated greens are still present.
I’m looking at this on a 99.9% Adobe RGB monitor with the color space set to sRGB, I did my TU in Srgb and downloaded and embedded color space in sRGB, This is the recommendation/specification from Dave. I was wondering if you uploaded this image in sRGB and embedded the color space sRGB ?
If the image seems to come up flat, then some masking, opacity, brush in could be applied to bring in back some color. Or perhaps even an inverted TKV6 darks 3
The comp looks fine. The feather detail is quite strong and you may be able to get by with less sharpening in future versions of this shot. The edited version seems tohave better greens than the original post. Greens are one of the more difficult colors to get right in digital photography. Otherwise, looks good…Jim
There are some minor blending artifacts in that some of the branches look cut off, Dennis. Colors look a little warm and the head, a little over-sharpened. DOF and composition look very good. The mossy perch adds a lot to this image.
Thanks, @Ed_Fritz. My export from LR is set up to convert to sRGB. I actually use Prophoto RGB when I’m in Photoshop. I did warm this image quite a bit in the RAW editor, so that probably affected the greens. I’m not sure what you mean about the back feathers toward the head being black. There’s a russet patch on the back of some of our local variations and in this case the head itself was gray with a bit of russet showing through here and there.
By the way, I’m not familiar with the TU acronym-what is it?
I understand about your russet comment. You are more familiar with the bird’s markings than I am. I also make a lot of bird images; I find myself battling the camera’s sensors urge to add color casts into the image and especially the blacks and especially in low light shadows.
After I take my image from my raw processor into ACR. I set the color space to ProPhoto, and then dbl check using the histogram that I have a small space in the black z1 and white free in zone 10.
The first step when I open in PS CC is checking for contamination by dropping some info points on the blacks, and greens and red. It depends what the dominate color is in the image. I then look to see how close the RGB values are. RGB is the mix that creates color. If I see a color value 1.5-2x higher then I start looking for the process to clean up where the color problem is. It is a choice, but I know if I can get my colors back to when they belong, I can add back in what I want and not what the camera tossed in there.
The russet color in the wings looks digital to my eye and experience with birds. To take the color out of the shadows (perhaps) to a non-digital image look, I used a pretty sophisticated process using Lee Varis 10 channel workflow, concentrating on the CMYK (black Channel). Lee is one of the original film->digital photoshop/photographers and has been instructing for many years about digital image processing techniques.