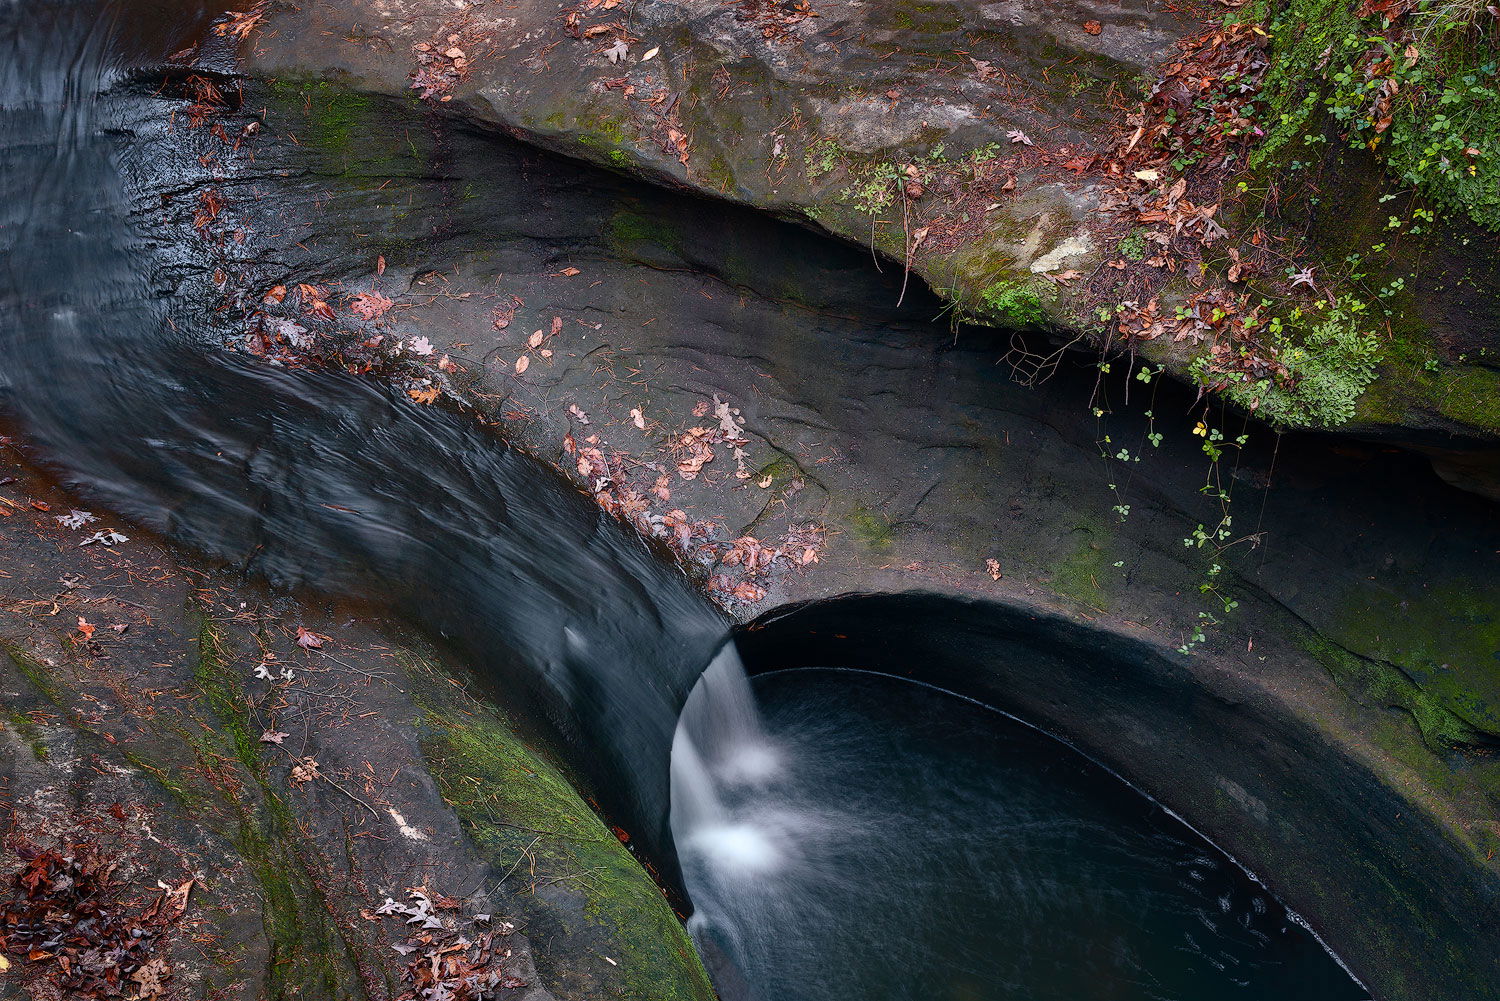
This is a shot from a state park not too far from me, they have a number of waterfalls and this little scene is right at the top of one of the more famous falls. I have others where I have cropped in a bit tighter, but there is something I like about the sweeping water coming in from the top left. Looking back I probably could have shortened the exposure time a bit to maybe hold a little detail in the water coming from the left.
What technical feedback would you like if any?
Open to anything that would have helped me compose this better in the field.
What artistic feedback would you like if any?
Open to any and all processing suggestions!
Pertinent technical details or techniques:
(If this is a composite, etc. please be honest with your techniques to help others learn)
ISO 100, F11, 2.0s
Just trying to get better so I am open to any help!
If you would like your image to be eligible for a feature on the NPN Instagram (@NaturePhotoNet), add the tag ‘ig’ and leave your Instagram username below.
What a cool little scene. I love the curve of the top of the waterfall. Since you like the sweep of the water in the ULC, maybe including more of it, to show more of a curve, mimicking the curve of the falls. It feels a bit cut off on the left of the upper water. I’d love to see some of the versions with tighter framing - the rushing water and waterfall curve might make for an interesting abstract.
The power of water to sculpt rock is an amazing thing. This pothole looks like an east coast cousin to the slot canyons of the Southwest. The thing I like best about this image is the repetition of the curved lines in the rocks, both above and to the left of the main pothole. I also like where you cut off the pothole with the frame edge, it makes for a very dynamic oval shape. I think showing the entire pothole might not have been as interesting as the way you have it here.
I wouldn’t worry too much about the water on the left, if you had it brighter, or with more detail, there is some risk it would distract from the pothole, which to me is the most interesting part of the image. With that said, I’d suggest burning down the exposure slightly in the left 1/4 of the image. Darkening the left side would help draw more attention to the center.
Thanks for responding, @Bonnie_Lampley. I don’t think I have any that show more to the left. I do have a few tighter images that I intend to process soon. I would love to go back when I get a longer lens because I agree there could be some really cool abstracts there.
Thanks for taking a look, @Ed_McGuirk. I am going to try burning down the left side. Do you typically do that with a true burn technique or do you use something like curves/levels to darken and then just paint it in? I assume either would work fine, just interested in how people do larger areas like that.
Do you use Lightroom and or Photoshop? If so you have a lot of choices of how to do it, all producing similar results, albeit with varying degrees of control.
In Lightroom you can use the adjustment brush to paint on the area, reducing the exposure and or highlights slider. If you want to refine the burn only to a specific tonal range (such as highlights), you can use the LR adjustment brush in conjunction with the Luminosity Range Mask to restrict where the effect shows.
In Photoshop I would not use the PS Dodge and Burn tools, they are blunt instruments. I use the TK Actions Dodge and Burn tools made by Tony Kuyper which can be controlled better. You can use TK Dodge and Burn Layer painting thru luminosity mask selections for the ultimate in control. But TK is a more advanced tool. However you can do something similar to dodge and burn in PS using gray layers, see the link to a brief article on this approach.
Thanks for that @Ed_McGuirk. I also have the TK Panel. I am going to try two different approaches and see which I like better. One by Dodging and the other by using a curves or levels. I will try to do it in a way that it impacts the lights and midtones, but not so much the darker areas. I may test out one with a darks layer inverted and one with just a regular lights layer…time to go play!
Hey @Ed_McGuirk here is an updated version with what you suggested. I did some darkening with a curves layer and also a dodge layer through a selection to avoid over darkening the already darker areas. Interested in any ongoing feedback!
David, the rework has done a good job of balancing the tonality across the image. Darkening the left side has drawn more attention to the pothole. I did not not want to assume that you used TK, so that’s why I discussed non-TK alternatives. In my own work I use a mix of dodging/burning thru luminosity selections, or using levels/curves and masking changes to specific tones and areas. Both ways get teh job done. Nice job with the rework…
Completely understand, @Ed_McGuirk . A few Sean Bagshaw tutorials is how I learned the basics of PS, I purchased the panel at the same time because I knew long term I would want it and I needed to keep learning. I have a long way to go in all aspects of photography but his videos helped a ton to get through the first few stages of development in PS.
Thanks for your feedback, I feel like that’s kind of the next step in improvement is learning how my images look to others.