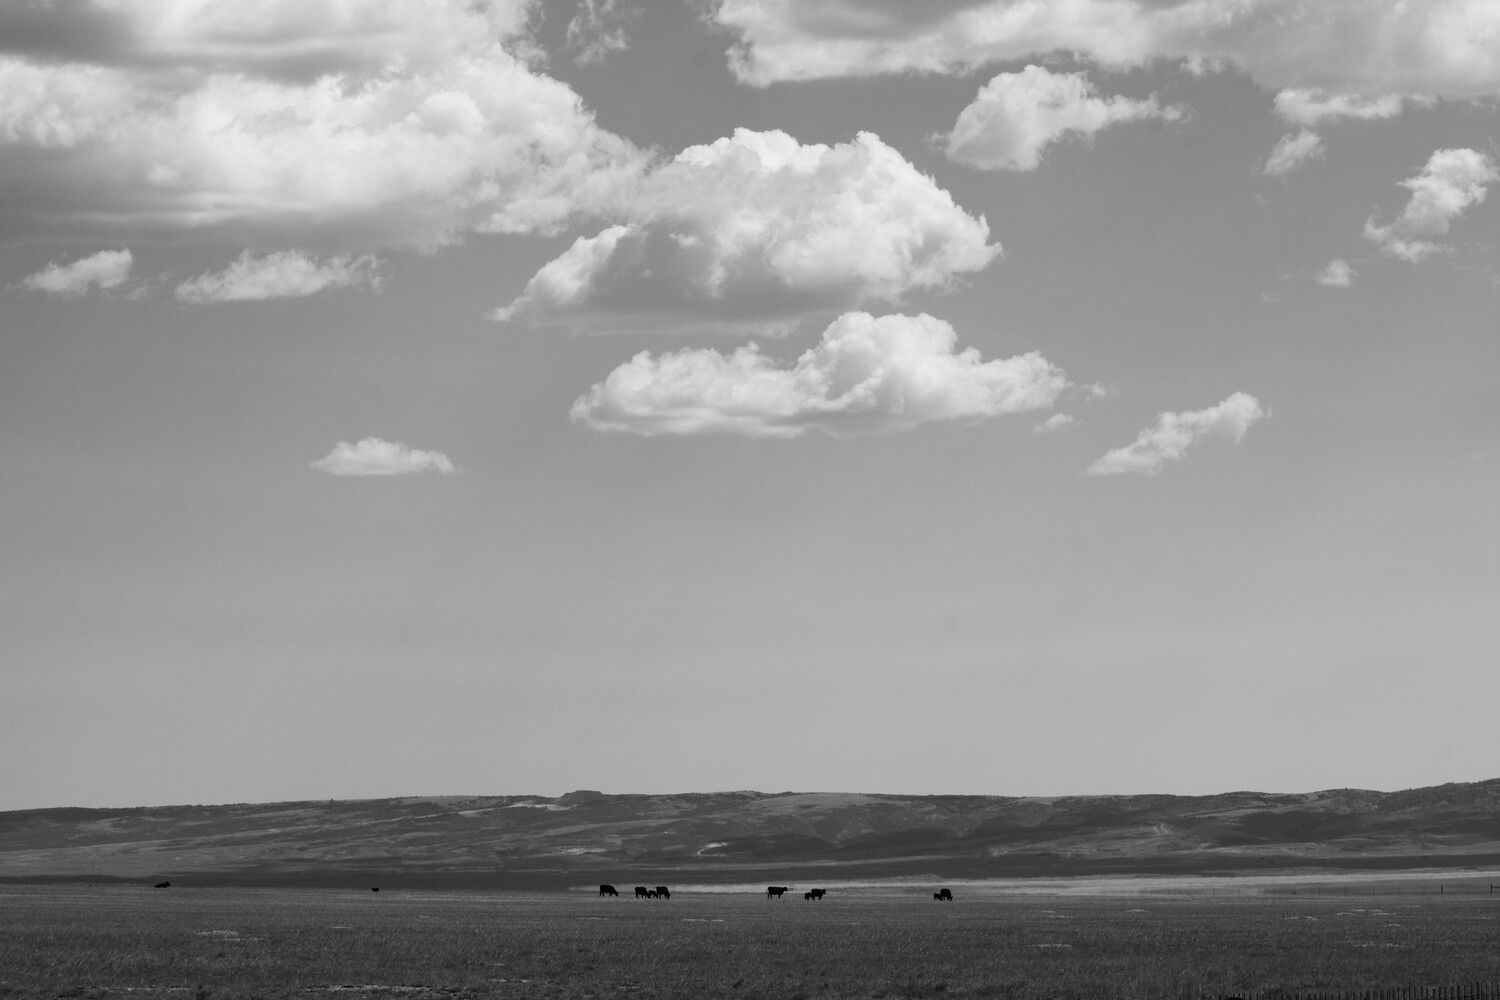
Being from the East I’m always so blown away by the big sky and vast emptiness of the West. I really liked the little cow silhouettes in the distance with the big clouds! Do you?!
Specific Feedback Requested
Do you think I should keep or get rid of the telephone poles? Do you think cows in the scene still make it a “landscape” shot? Is it even any good?!
Any comments, feedback, etc always appreciated!
Technical Details
Is this a composite: No
Nikon D3400
ISO 100
70mm
f/13
1/1000
I had to adjust exposure slightly. Came out a bit darker than I expected. The sun was so bright! On my little camera screen it looked bright enough but different when I uploaded.
This one does a nice job of conveying the wide open spaces of the big sky country. Given the quality of the light here, I might consider a conversion to B&W and really make the clouds pop. I would lose the telephone poles. The cows work for me, given the scene and the location.
I think you could play with the blue and cyan channels in the conversion if you want to get more of the Ansel Adams red/orange filter look. It is fun to play with that. The B&W conversion overall works better for me with this image.
Vanessa, I agree with @Harley_Goldman about this image having more potential in b&W than in color. B&W will let you push contrast harder for creative effect than you could in color. And B&W will also allow you to use the underlying color information to modify tones in the B&W conversion. In the case of this image, I would lower luminosity in the blues to darken the sky. And I would increase the luminosity of red and yellow to make the grass brighter, and create contrast against the sky. This would also allow you to make the cattle stand out more too. Here is a rework with a directional example of what i am talking about, for illustration.
Oh yeah, I like that! I was imagining something like that but just couldn’t figure out how to achieve it! Thanks for explaining! Do you do those adjustments while it’s still in color and then change it to black and white? I was trying to make adjustments after I changed it to black and white…
I use Lightroom and do it during the conversion, using the B&W panel in the develope module, which lets you play with the luminosity of underlying color “channels” during conversion. Photoshop has something similar if you convert there.
Thanks! I don’t have either. I tried using them but found it very hard on my iPad. So I’m working with Pixelmator photo which was made exclusively for iPad. It’s pretty basic but I know it has color adjustments. So I’ll be trying it out! Thanks, so much, for your help!
Thanks! That’s so kind of you! The problem I have with this one is you need to have another app, I think most people use Photoshop, to convert your raw files so then you can upload to Lightroom. I had tried that before, but it just gets so overwhelming for me to have my photos in 3 different places. Because iPad comes with a photo app that just automatically downloads your photos when you put your SD card in. Like there’s no choice. At least with Pixelmator I can convert the raw files and do whatever adjustments in one place, so my photos are basically in only 2 places in addition to the cloud which I don’t have to keep track of. Maybe not as sophisticated but what I can handle!
I do not own an Ipad, so I can’t speak to that aspect of how it affects workflow. What a lot of photographers do though is use a combination of Lightroom and Photoshop. They import the raw files to a Lightroom catalog. They do their raw conversion in Lightroom which allows you make a lot of different edits to exposure, color, contrast, crop, etc. If those LR edits are all you need, you have one file, the raw file, plus a set of processing instructions in the LR catalog. You can then make whats called a Virtual Copy in LR, and process it a different way ( for example convert to B&W). and you still have only one file but with 2 sets of processing. If you want to create a Jpeg for web display, you export a Jpeg copy from Lightoom, and it leaves your master raw file unchanged. If you elect to process the raw file beyond what Lightroom can do, you go “edit in Photoshop”, and it brings the file from LR, and you can make further tweaks there, if desired (for example PS has more powerful cloning ability, such as Content Aware Fill). When finished in Photoshop, you save the file as a TIFF, and it automatically gets re-imported back into Lightroom as a second copy, but it gets placed next to the original raw file in the LR catalog hierarchy. This “start in LR, finish in PS” workflow is very common. However a good percentage of my edits never go beyond Lightroom, so my edited raw file is the only one.
If you want to take the next step up in image processing capability, I would encourage you to consider getting a laptop (or desktop). Get the Adobe Photographers plan, $10 per month for LR and PS together. This combination would open up a lot of new processing possibilities for you, and since many folks here at NPN use Adobe, you have a built in knowledge base of Adobe users here to get advice and suggestions from.