You may only download this file to demonstrate how you would process the image. The file is Copyright of the photographer, and you must delete the raw file when you are done. Please post a jpg of what you created, along with an explanation of what you did and why you did it.
Hi Mozzam,
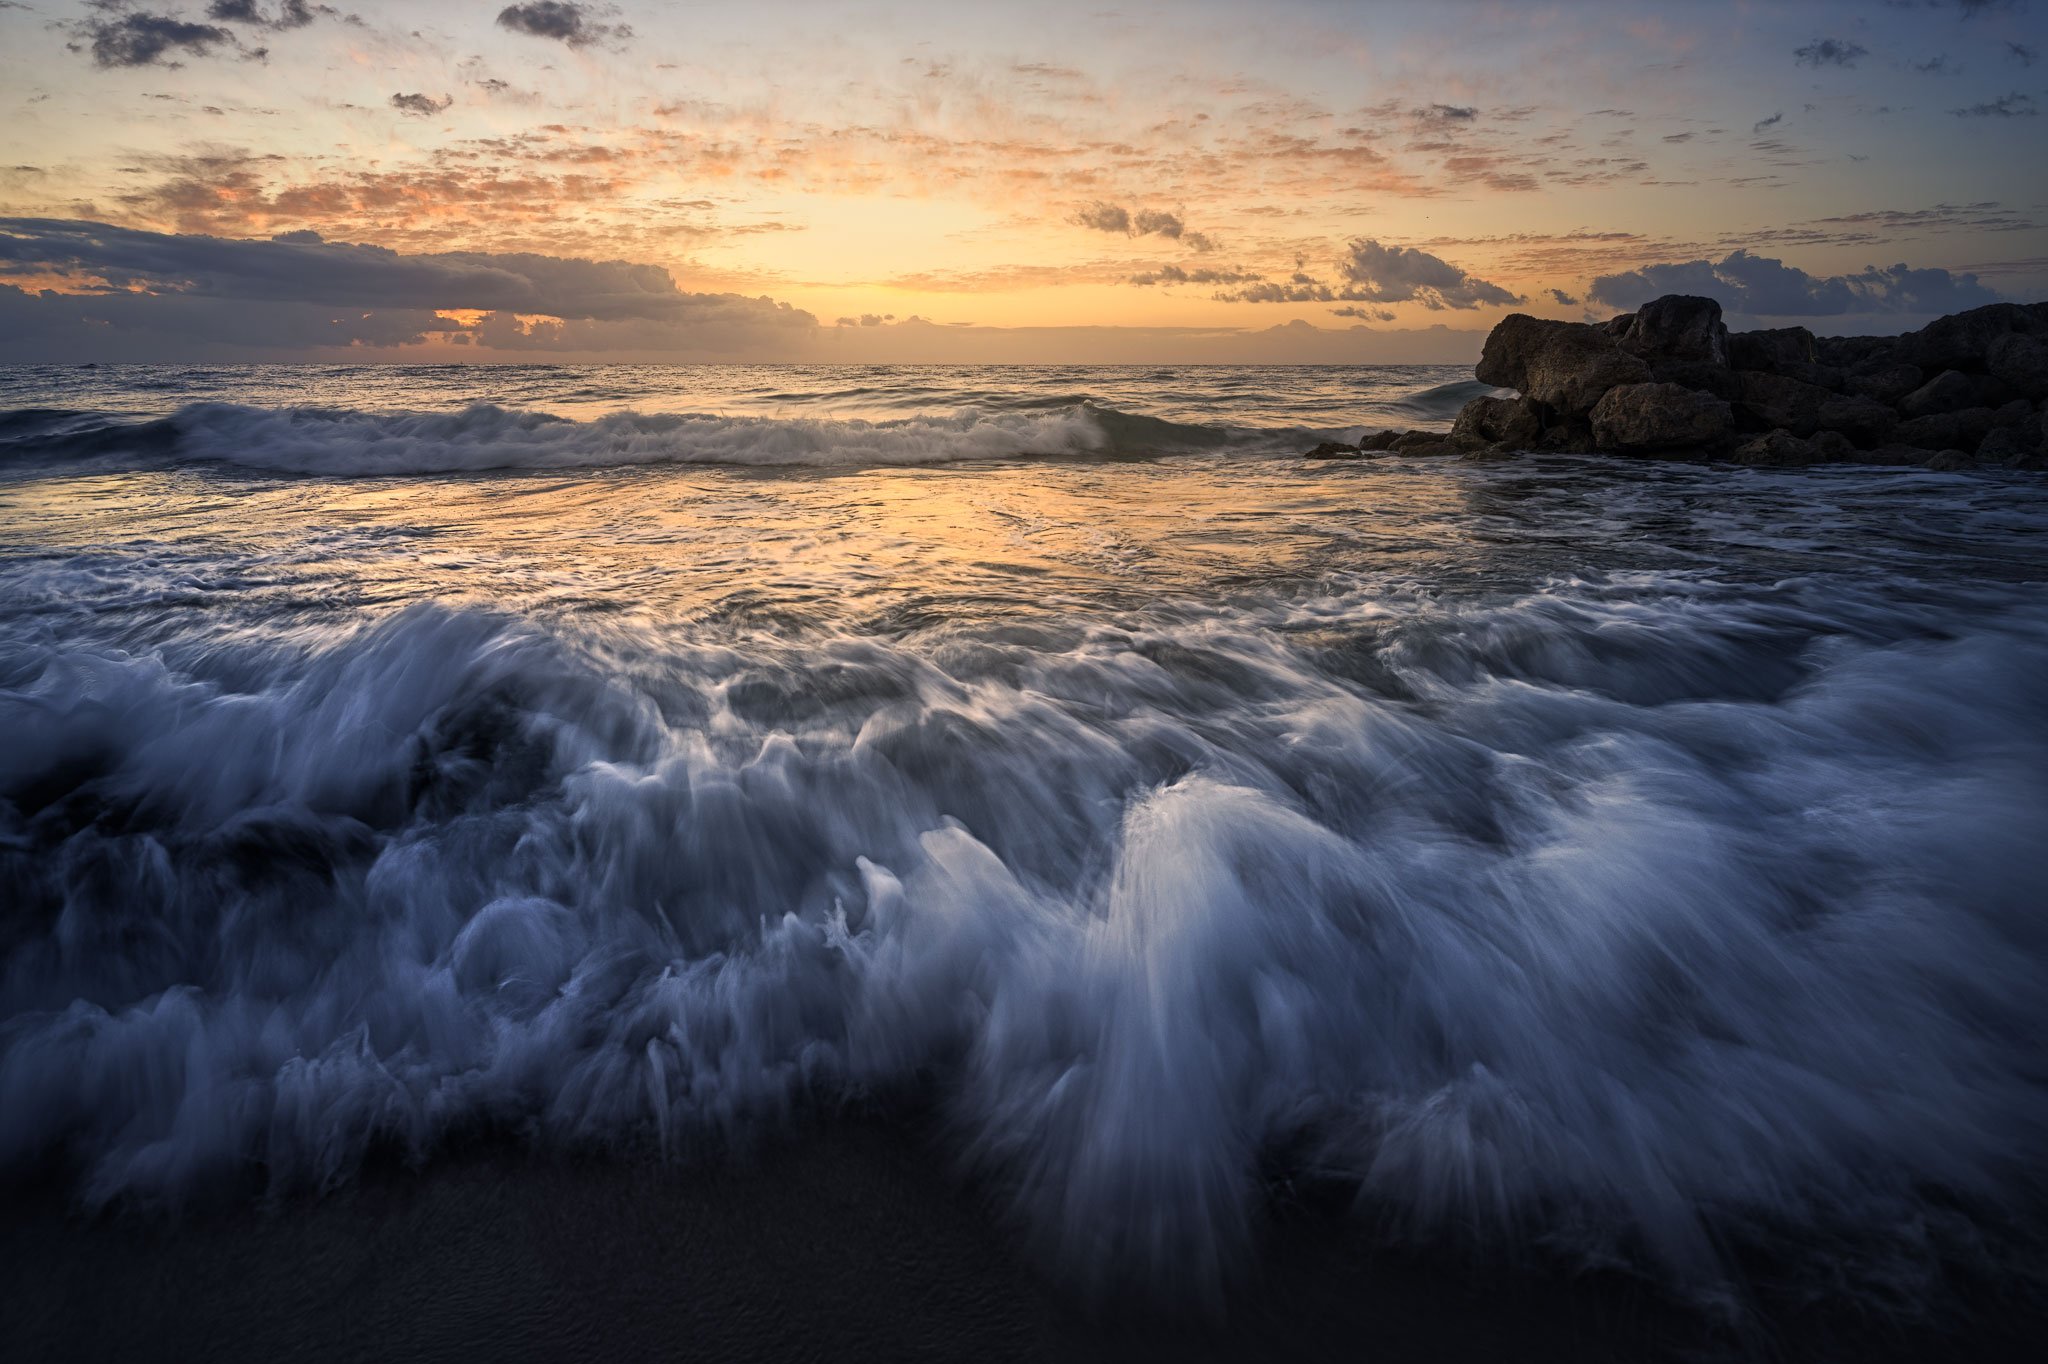
what a great seascape shot. I love to photograph flowing water. And you chose the perfect shutter speed for this scene. You’ve captured the dynamics brilliantly.
The Image Processing Challenge is a lot of fun. Putting your hand on someone else’s raw file is quite interesting. I think you go further in post-processing than you do with your own images.
Opened two versions as Smart Object in PS (one with a cooler white balance and one with a warmer white balance for the highlights)
I created a mask to blend in the warmer version
several Levels adjustment layers with masks to add some contrast
I also used Triple Play actions from TK Panel to add some contrast to the water (I have heard of these actions here at NPN for the first time)
I added two blank layers (one with Overlay mode, and one with Soft Light mode), sampled a warm color in the sky, and painted on that layers with a soft brush to emphasize the light.
Again, a great image with an awesome mood. Well done!
I finally had some time over the weekend to have a go at processing this image. I find the whole exercise of editing images that I didn’t shoot myself rather enjoyable and because I don’t have the associated memory of shooting the image, I feel freer to take the image in any direction that I feel suits it best. With that said, here is what I did:
I opened the image up in ACR and did some basic edits – white balance, exposure, contrast, shadows, and highlights.
Then in Photoshop, I brightened some of the white water in the foreground.
Then some of TK’s LIGHTS and DARKS Triple Play to add some micro contrast to the light and dark areas of the image.
Next, I brought the image into the NIK Vivaza plugin to give the image some more brightness, “structure”, and a bit of warmth.
Next, I added a vignette to the image – I do this quite often on many of my images.
Then a little bit of curves on the dark parts of the image to make them pop a little more.
And finally I fixed the halo around the rocks on the right. While I was doing this, I also cloned out the yellow rope but that was minor.
Hi Jens,
Thanks for taking the time to look at my image and spend the time putting your touch. I do like what you did. I would add that the mood was definitely a more vibrant. I may have added a little too much with TK 8. Many thanks again.
Hi Tom,
Many thanks for spending time putting your take on the image. You are so correct when you have to visualize what the scene would have looked liked. You also did an excellent edit. I told Jens, that the scene was vibrant, hence my edit. Thank you again.