Image(s)
Image Description
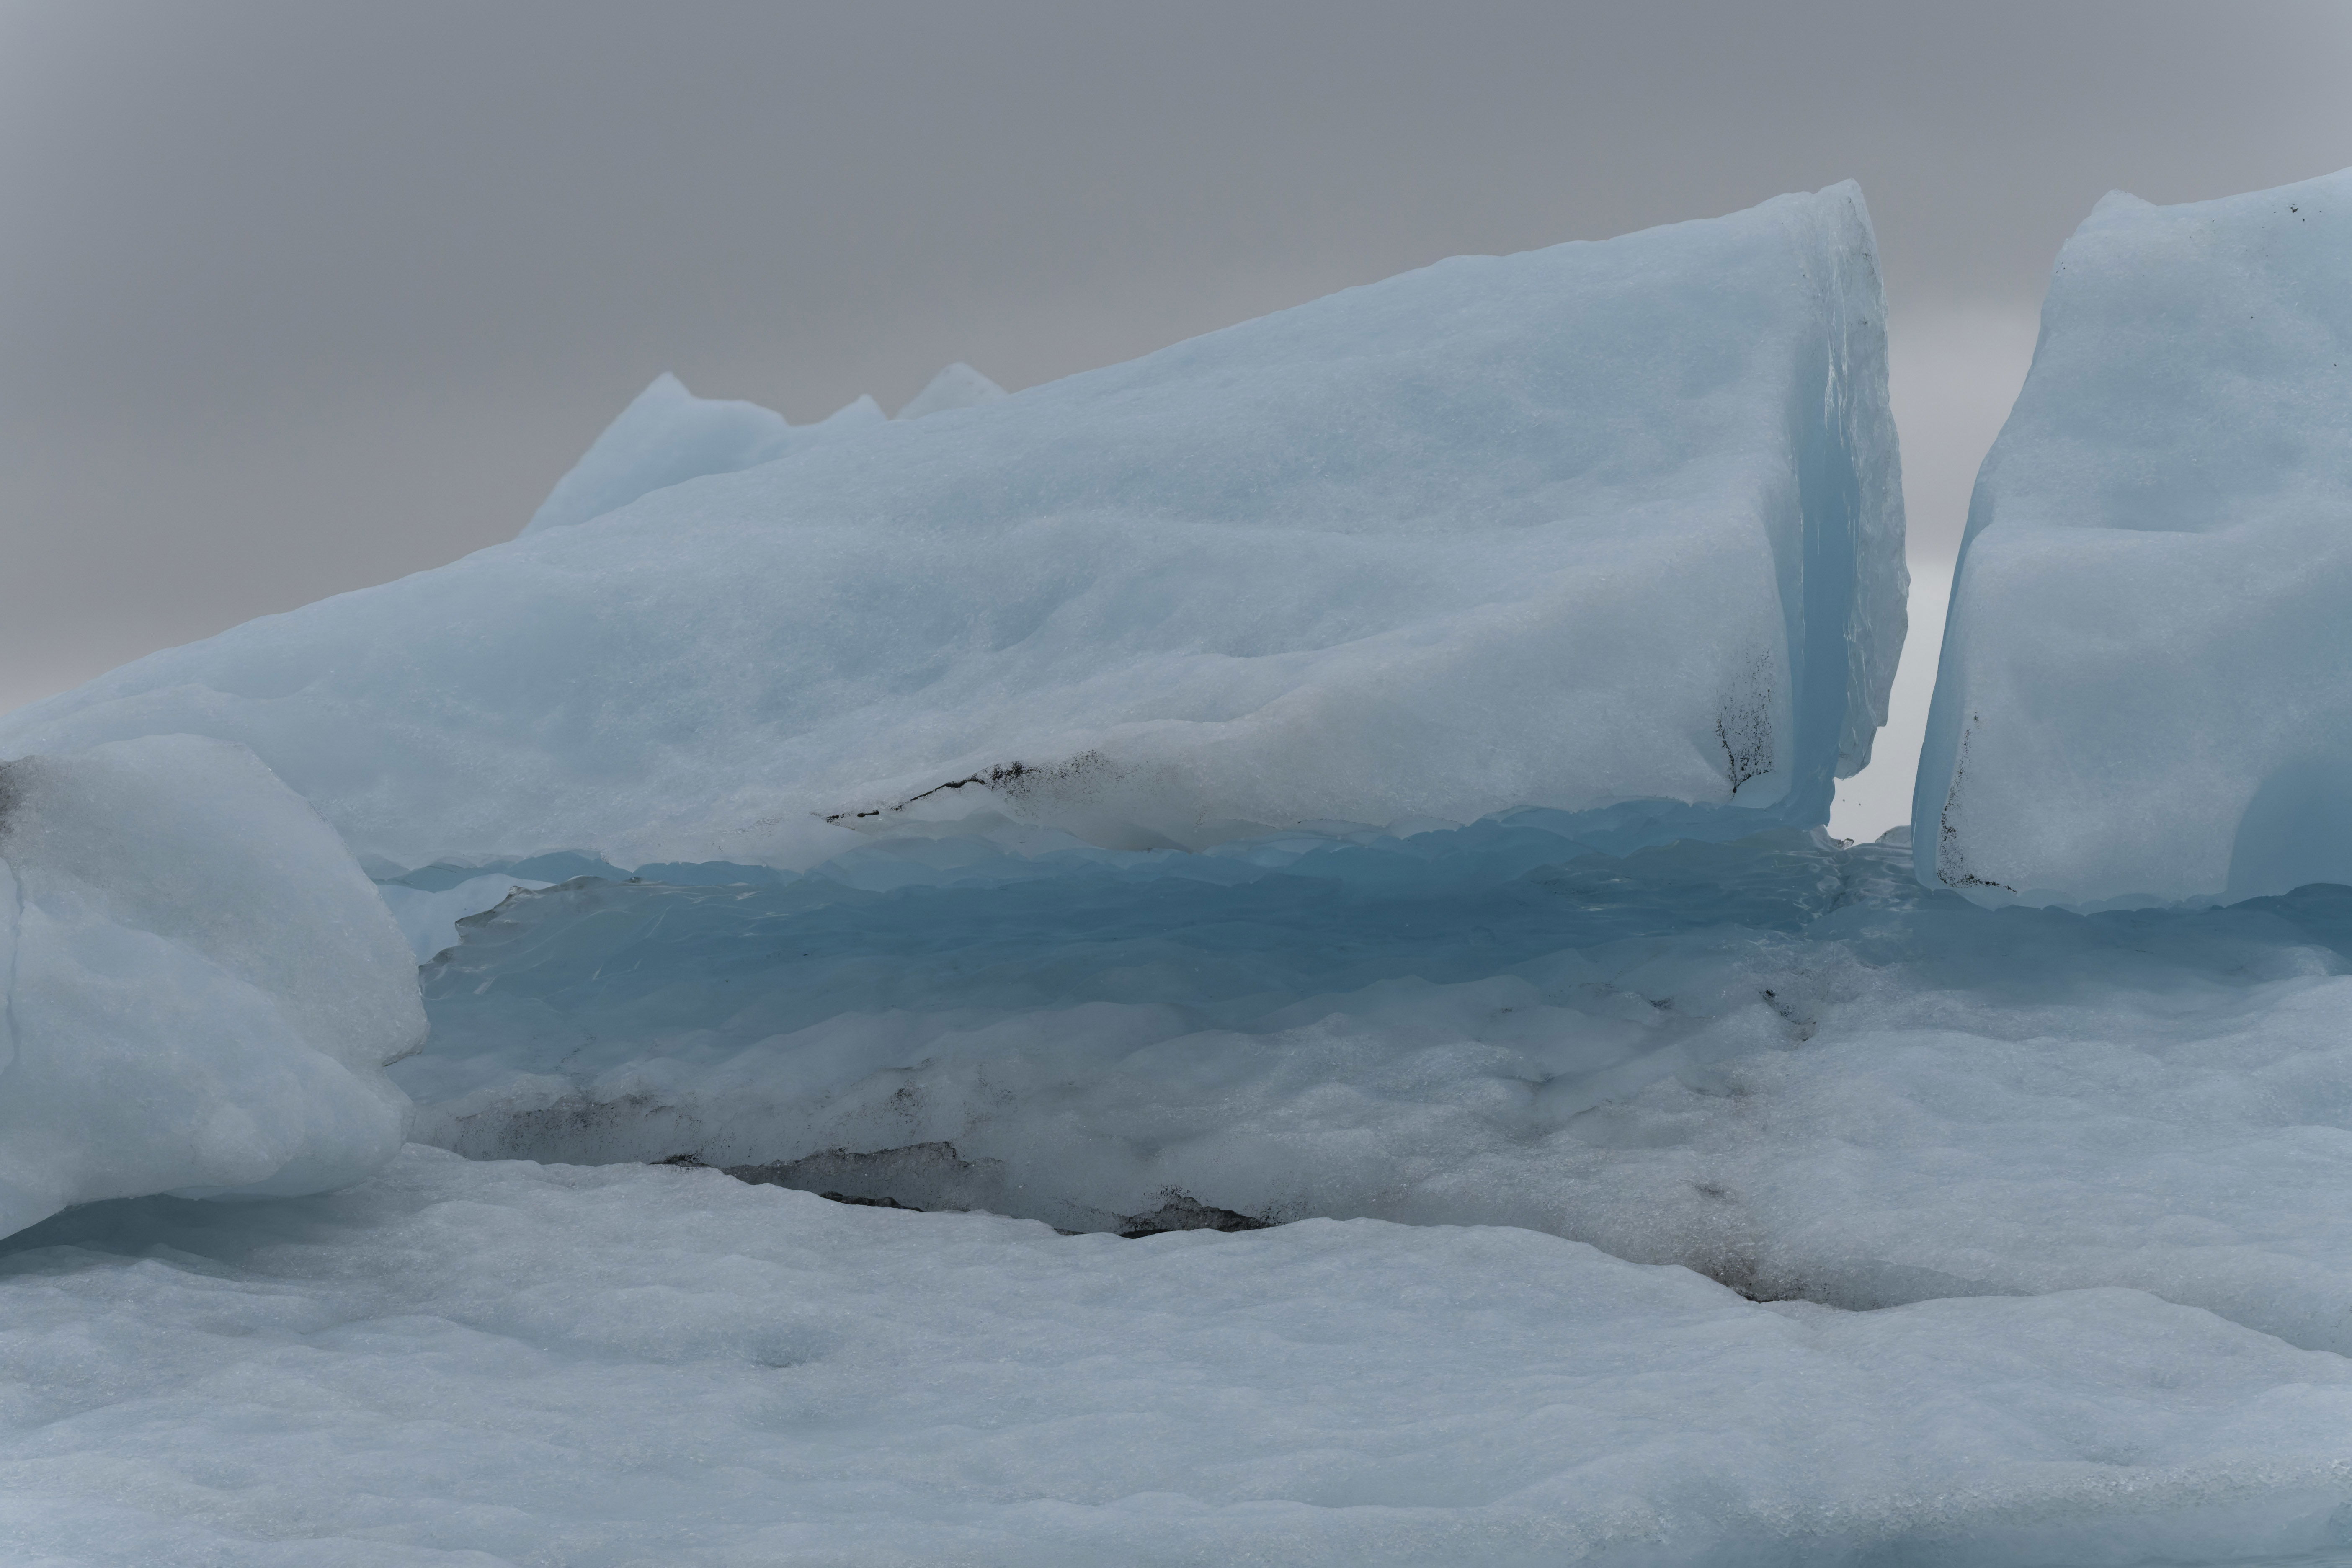
I have posted this image before but this time I did some extra processing is in ON 1 camera raw. the idea was to bring out the glow but I’m not sure I’ve succeeded yet.
Feedback Requests
anything that helps me as a photographer improve my skills
Pertinent Technical Details
ISO 1000, 100 to 400 at 166 mm , F8, 1250th, Sony a1
I like composition and the idea here, David. I do think you could do a couple of things to spice it up a bit.
First, I think the ice could be brightened a bit. Second, I think you could do a little cloud sculpting to bring them out a little more.
This is a fine effort!
-P
Preston:
Yeah, this got posted by mistake. Apparently, when I transferred the file to the website, it came out being almost flat. I sent a message to Mark to ask him what was going on, but he has yet to get back to me. I tried something a little different
This was processed with DXO pure raw version five and ON 1 ., The latest version. 2026. I don’t know if there’s a problem with that program and NPN.. This is the first time I’ve had this problem. So I’m a little suspicious. In any case thanks for your comment and I will repost this once. I get an answer back from Mark.
David, I haven’t seen a message from you about this post…lost in the ether… I like the blue tones here and agree with @Preston_Birdwell that some brightening would help.
Interesting, David. I certainly see where you’re going with this. The first thing I’d check, since you used ON1 to process it is the conversion to jpeg. Make sure it uses the right color space and that it’s embedded in the output file. I downloaded ON1 years ago but haven’t ever used it to a significant extent. In my work flow I’d be doing most of the processing of this in LR, but ON1 is supposed to have the same capabilities.
Very nice capture, but what you describe – a flatter appearance when posted here – is a color space issue. The image did not get converted to sRGB when you created the JPEG to post. There will be a setting somewhere to convert to sRGB. It is vital to do that. Nothing nefarious is happening after you send the file to post.
Thanks all: @Preston_Birdwell @Mark_Seaver @Diane_Miller @Dennis_Plank
I appreciate all the help with this. It still not what I had anticipated but I think there is an improvement.
I will say the convert to sRGB is easy to do but it’s a little confusing because there is no as sRGB choice under the canvas or size related windows in Photoshop. The only choice is a mode of RGB color.
That’s because the color space doesn’t matter when you are resizing. The color space is only relevant when you go to export. (Or when you go from a raw file into PS or another file editor, or when you go to a print dialog.)
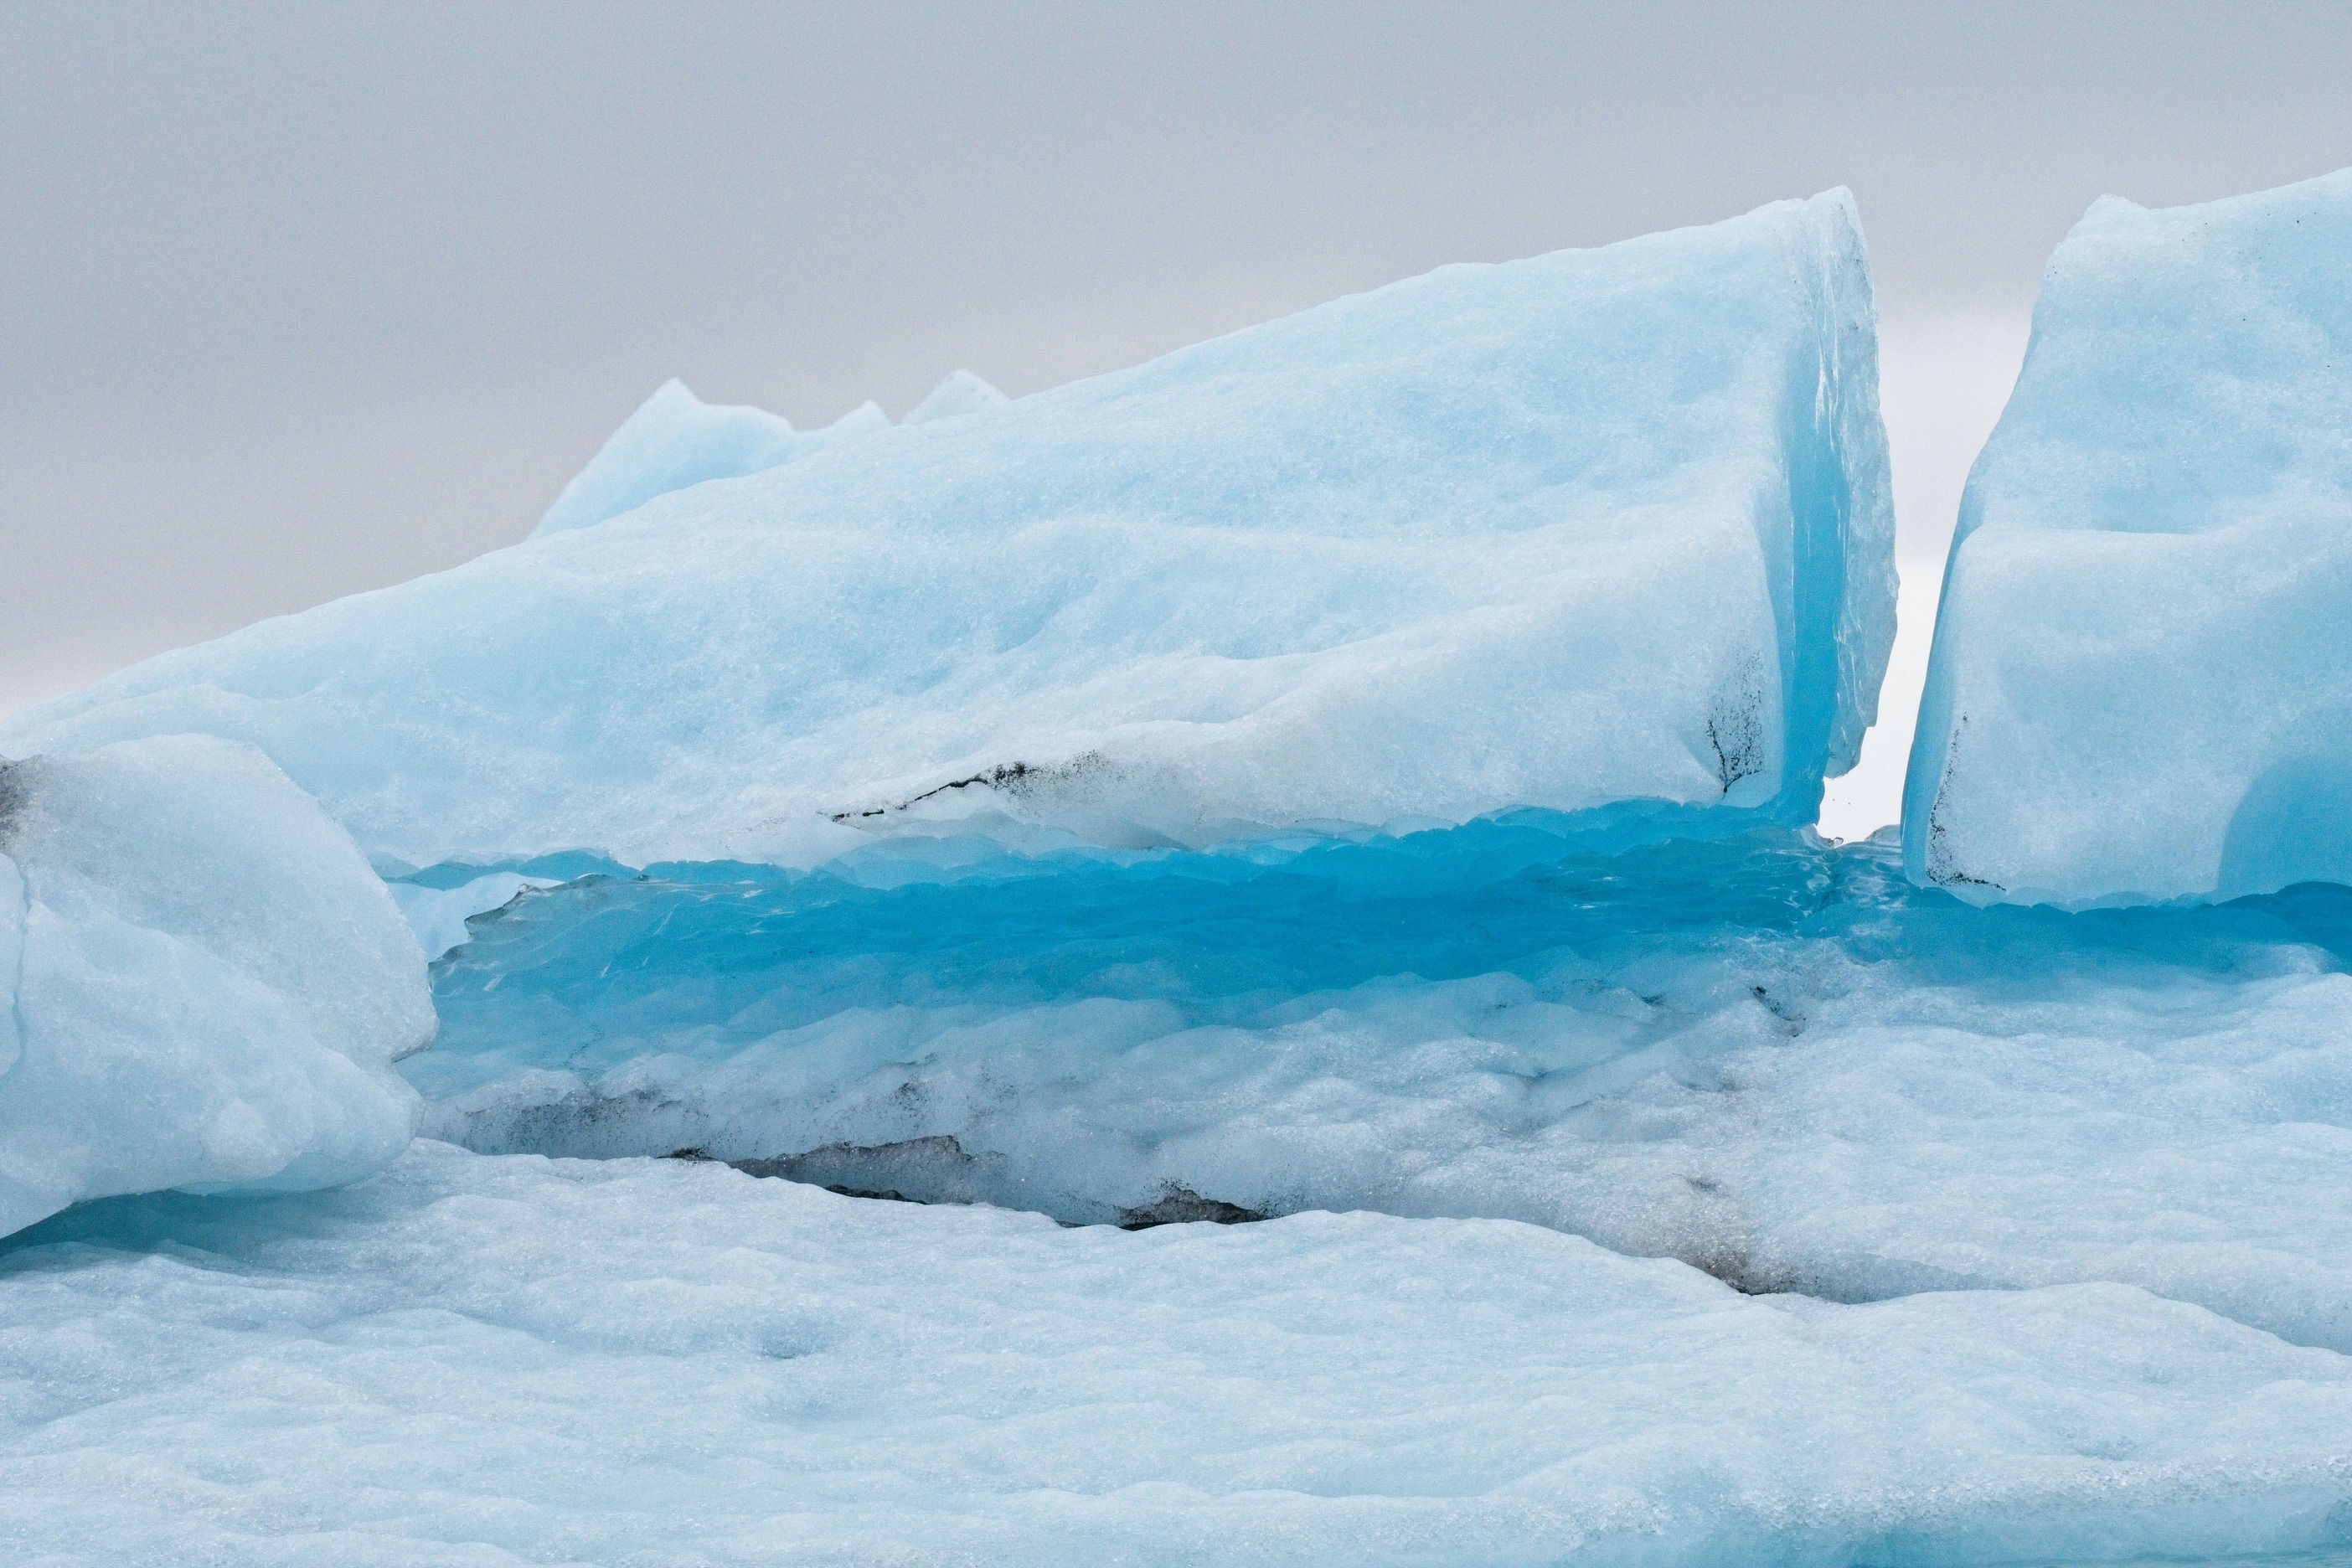
The last repost is really getting there, David. I could see raising the highlights to get the brightest parts of the snow very close to white, but the blues are really nice.
After writing that, I looked at your first repost and I think it’s even better. I really like the highlights in it and the blues are still incredible.
I agree with @Dennis_Plank – the first repost has a nice balance of the blues leaning toward cyan, and nice whites, but both are much improved over the OP.
Here’s a tip, David:
- Flatten the image to keep the file size as small as possible after setting image size, canvas size, sharpening, etc.
- In Photo Shop, go to Edit>Convert to Profile and then select sRGB
Note: I use the legacy “Save for Web”. (File>Export>Save for Web (Legacy). In that dialog box you can easily select “Embed Color Profile”. You can also easily control your jpeg file size here.
I’ve been doing it this way since, well, forever, and it works a treat.
I hope this helps,
-P
Edit: I really like the 2nd repost. It’s darn close to what I was thinking. I appreciate your efforts here.
-p
File > Export > Save for Web is an excellent tool. If you use it to create a JPEG you don’t need to flatten or convert to profile before. It will flatten for you because JPEGs don’t have layers. Just choose JPEG in the second box from the top and below that check Embed Color Profile and below that check Convert to sRGB. You don’t have to resize either – just specify the size (in pixel dimensions) near the bottom and it does everything, including the sharpening for the resize operation, for which there are several choices in the Quality box. Bicubic Smoother is usually fine.
You can control the file size with the Quality slider just below the JPEG choice. After setting the pixel dimensions, look at the size it is showing in the far lower left and adjust the Quality slider as needed if you need a smaller file than what the max quality gives. One stop shopping!
Just use this on your master file, which should always stay at the size it came out of your camera and in the color space PS is set to. Of course, it might have been cropped in PS, but no need to do any kind of resizing otherwise of that master file, or messing with its color space.
The only other time you would do that sort of thing (in addition to making a JPEG for the web) would be to send a file out to be printed, which might involve exporting a TIFF or JPEG, depending on the printer.
1 Like
Diane, thanks for your additional comments on “Save for Web”
I should clarify something regarding my workflow.
- I create a copy of my master file, flatten it, and convert to sRGB.
- Next, I use TK’s Sharpen for Web action for setting the long side image dimension and sharpening amount.
- Once done, I flatten the sharpened image and then use Save for Web.
Thanks again for the nice tutorial!
-P
Thanks for clarifying your workflow, Preston. I appreciate the additional details.
Though I have used the save for web feature, I should use it more often and don’t think about it enough.
Thanks for your input.
David
@Preston_Birdwell – that makes sense for the case of using that sharpening action, which does give good control.