Lightroom’s latest update to version 11 has made a few people nervous with all the talk about Masking and because that term is most often associated with Photoshop with its layers and complexities, it might be scaring some folks off. Other than some additional functions for more targeted adjustments and a layout change, the tools you’ve been using all along are still there and they still work the same way - Linear Gradient, Radial Gradient & the Brush.
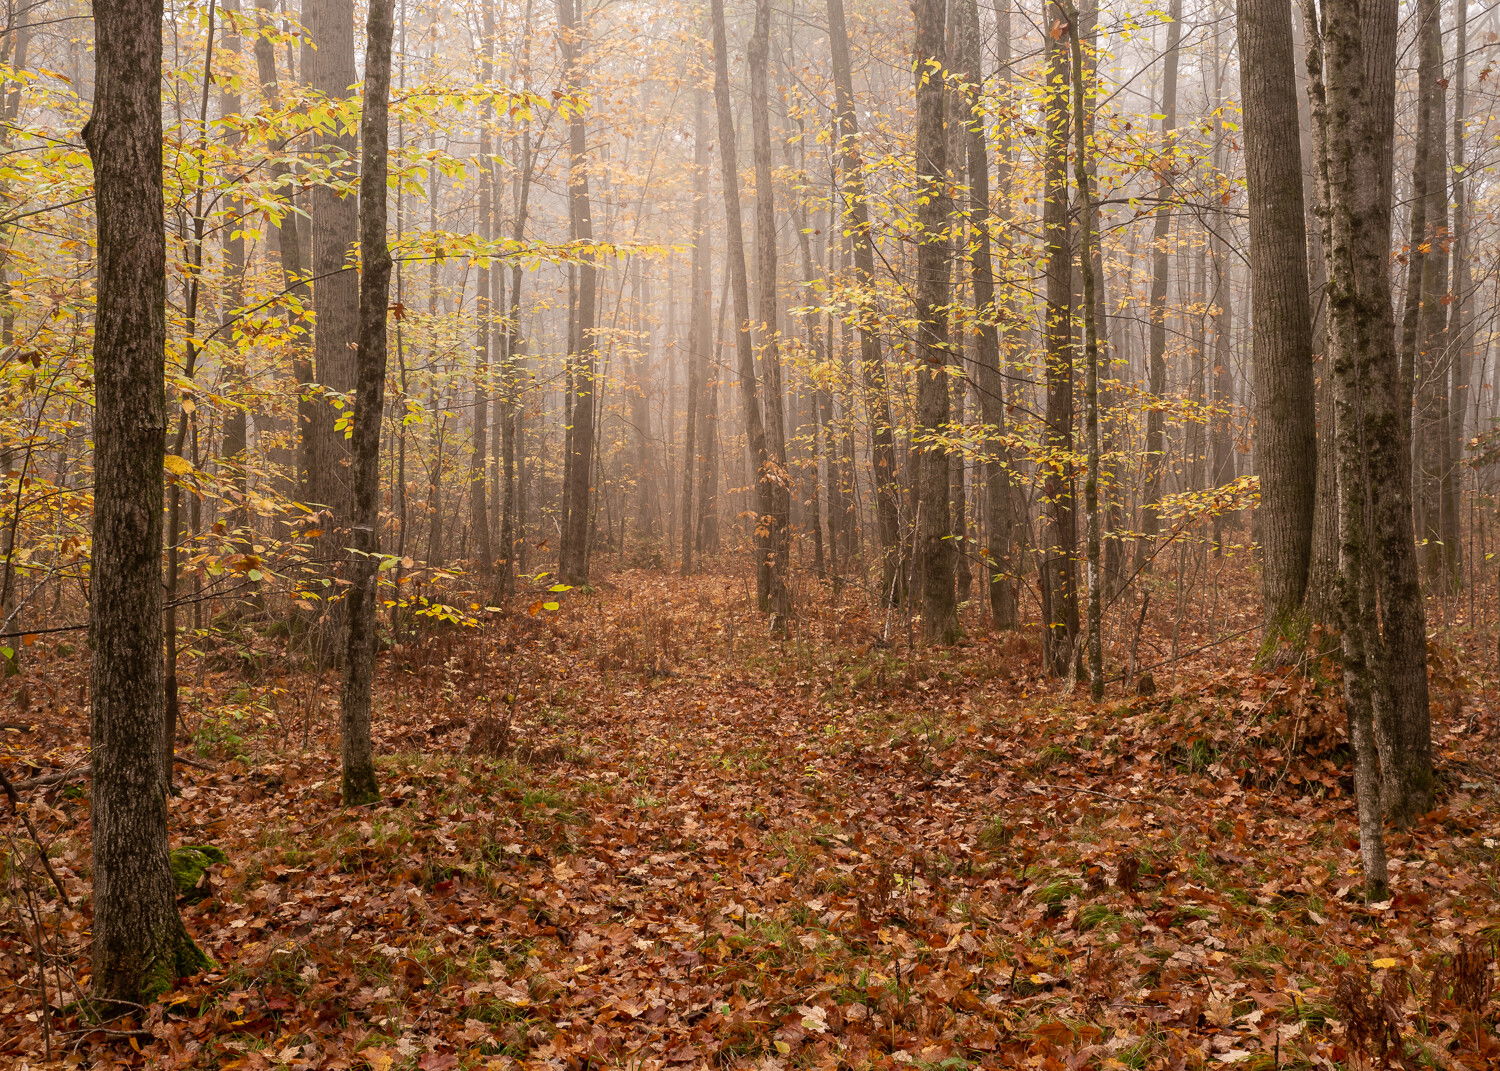
You don’t have to use the enhancements until you’re ready. With that in mind, I tackled this shot of a foggy forest track using only Lightroom except for a little bit at the end. Here is a before and after example of how I changed the mood and improved this image.
After
And here’s the unprocessed image I started with -
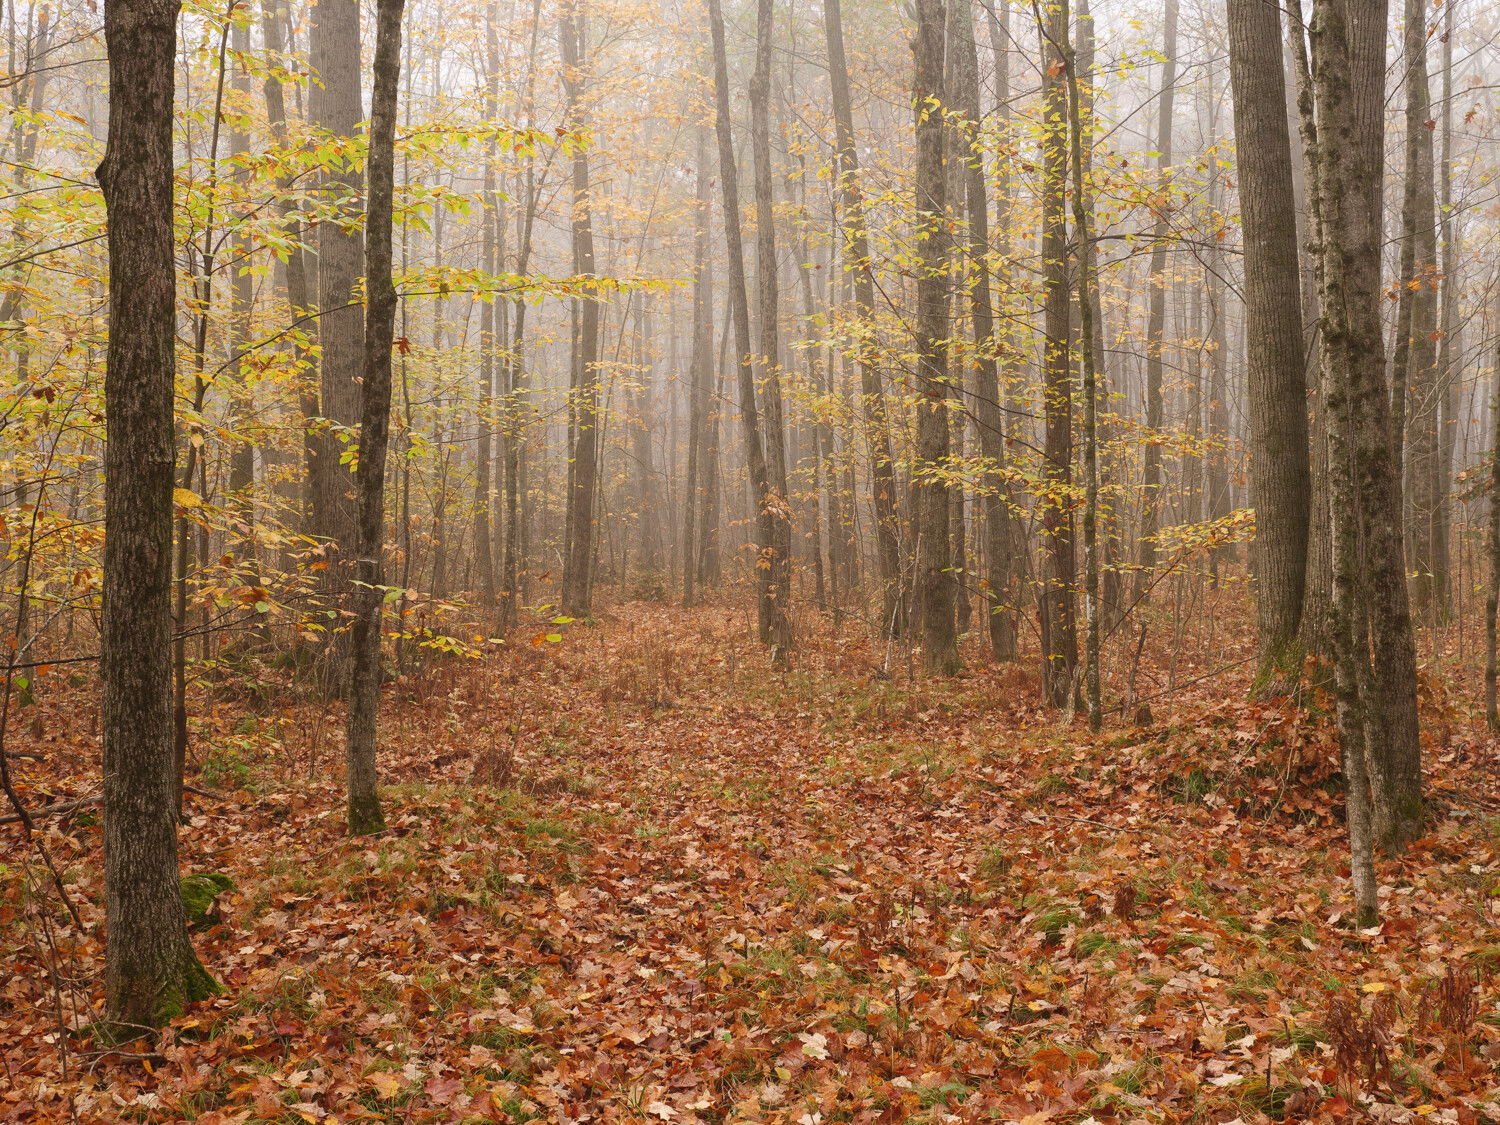
Although there isn’t a huge, dramatic change, many small adjustments made this image sing -
- Changed to Camera Scenery to Adobe Color Profile because the saturation was too heavy, then hit Auto Settings to start
- Adjusted whites, shadows, vibrance and exposure
- Added a Linear Gradient in each corner and decreased Dehaze to amplify fog
- Crop to eliminate small tree on the right and balance the two groups of trees closest to me
- +7 Texture
- HSL Panel to work Orange and Yellow color sliders for better Luminance and Saturation - I took the orange down a little so it wouldn’t overwhelm, took the yellow up a little so it would glow softly
- Added a very gentle S-curve in the Tone Curve panel
- Warmed white balance slightly to 6000K (some fog photos look better with bluish fog, but I didn’t feel that was right here and went for a warmer look)
- Added a Radial Gradient at the very back of the image - increased exposure slightly, reduced dehaze for a more foggy look and warmed the white balance a little more. I often do this with trail shots or river and stream shots to pull your eye to the very back of the image and make you want to step right into it. I find warming the area has an inviting effect.
- Used a brush on the far edges of the shot with some lower dehaze to make it foggier
- Used another brush - a bit bigger and fuller to darken the edges of the track near the trees, this creates a slightly lighter path within the path and also helps lead the eye through the scene.
- Slight lens correction to manage a little distortion - constrained crop
- Added a Linear Gradient to lowest right corner, used Subtract and a brush to keep the center of the path brighter
- Revisited Tone Curve panel to raise mid-tones just a little bit - this improves the foggy atmosphere and adds a little lift to the overall luminosity - muddy mids are the death of an image to me
- Details panel for Sharpening with a fairly tight edge mask and a touch of Noise Reduction
- Pulled overall exposure down very slightly
- Spot Cloning for patch of bright sky breaking through the branches in the upper left - didn’t like the results in Lightroom so used Edit in Photoshop to use the Healing Brush there - Saved back to Lightroom.
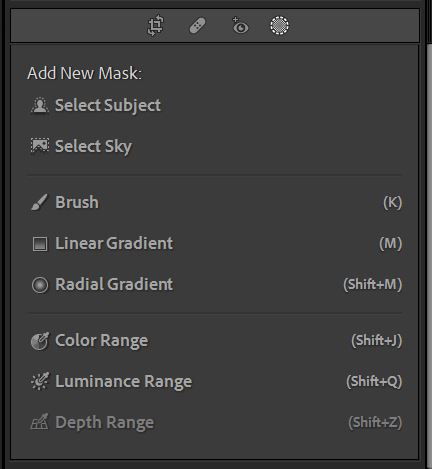
In version 11 when you make a local adjustment using the new Mask panel, a list of each mask or adjustment appears when you open the tool panel. Instead of clicking New under each tool like the Linear Gradient, you can choose from any of the tools by selecting Add Mask. Each mask can be labeled according to what you did so that you can easily switch between them for further refinement. As you refine them by using the Add or Subtract or Intersect options, those adjustments appear under the main mask label.
Sometimes it can be a little hard to see the potential in your RAW images, but thinking about why you took the shot and what the experience was to be there, you can put together the steps you’ll need to take to create that final result.
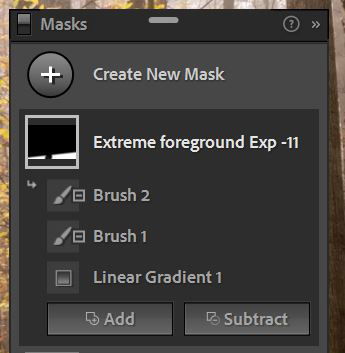
Here’s what my Mask panel looks like with all these edits -
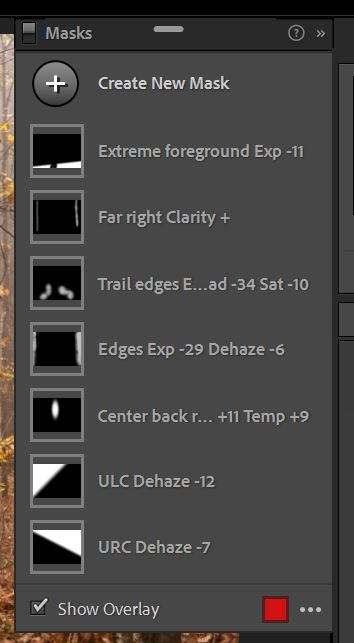
The latest adjustments are on the top and the white areas clearly show where you have done the changes. For folks who don’t use Photoshop or have been intimidated by it (like me), the new capabilities in Lr are really powerful and a game-changer. By experimenting with these and especially the Intersect with Mask options for Color and Luminance ranges, very precise adjustments can be made for the look you want. I hope this helps and you dive in!