Hi. I have been working with the new masking tools in Lightroom and appreciate the improvements. However, I am finding in some images, when I use a luminance or color range mask, that I get some artifacts around the edges in certain sections of the image. What are the best ways to avoid this? Or, I think Photoshop’s masking tools are more advanced and maybe I should be learning how to do masking in Photoshop instead? Thanks for any feedback.
Masking in LR is a lot less precise than it is using luminosity masks in PS. What kind of artifacts are you getting and what type of mask are you using? I see color range and luminance but is this a brush? Radial gradient?
1 Like
While I’m mostly Ps guy and I’m doing only initial “light balancing” in lightroom, I like to fiddle with new features from time to time. I can repeat what Matt already said - masks in Lr, while getting better every year, are still subpar to the flexibility of Ps in this regard.
I also recently received a question from a fellow photographer - she noticed a weird artifacts and blur around some of the edges in her image. After inspection we found out that it was due to the not-so-great masking introduced by Lr automated tools (eg. “select subject”) which needed some manual work to mitigate the artifacts.
I find it easier to both mask and apply some effects in Ps rather than Lr, so my personal recomendation would be still “switch to Ps for complex masking and adjustments”. ![]()
1 Like
Thanks for your reply Matt. I used the point color/color picker and then chose a color range mask to make the adjustments as my goal was to target the background of the image. The artifacts look like sharply defined highlights around some parts, but not all, in the image where the background mask has been applied.
Thanks very much for your reply Andrzej. I have been considering taking the plunge and learning how to use Photoshop. Photoshop intimidates me a bit but maybe I just need to take it slowly and learn little bits at a time.
I assume you are editing a RAW file and not a jpg? Are you able to show us some examples?
Yes, I am working with a RAW file. Sorry for my lack of knowledge; this is my first time posting anything to the forum. What is the best way to send an example? I need to go out and about for work now but can try to figure out how to send an example in the next few days.
I like to just take screenshots and copy/paste them into my comment.
Windows: windows key+shift+s
Mac: Shift+command+3
Thanks for the guidance regarding the screen shot.
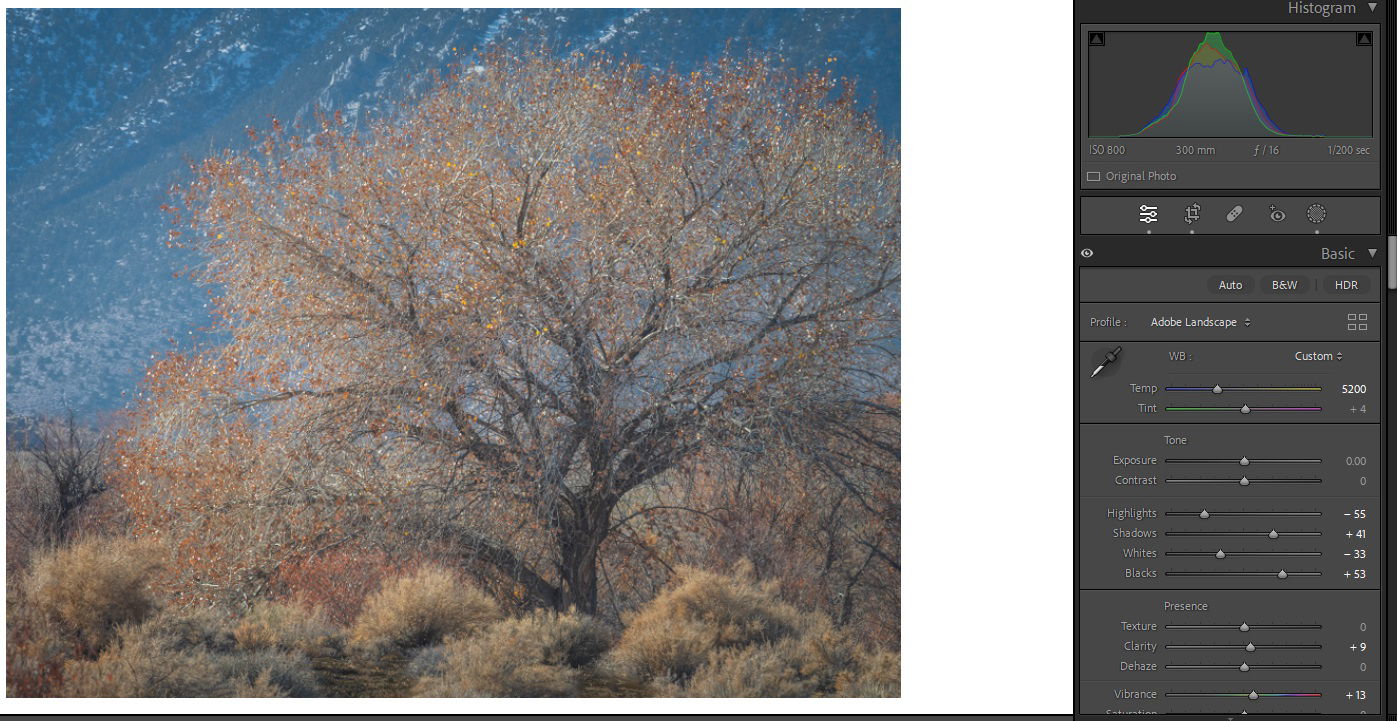
Here is a wider view of the image for context…
And a second zoomed in shot of the artifacts… the white borders around some of the branches and leaves

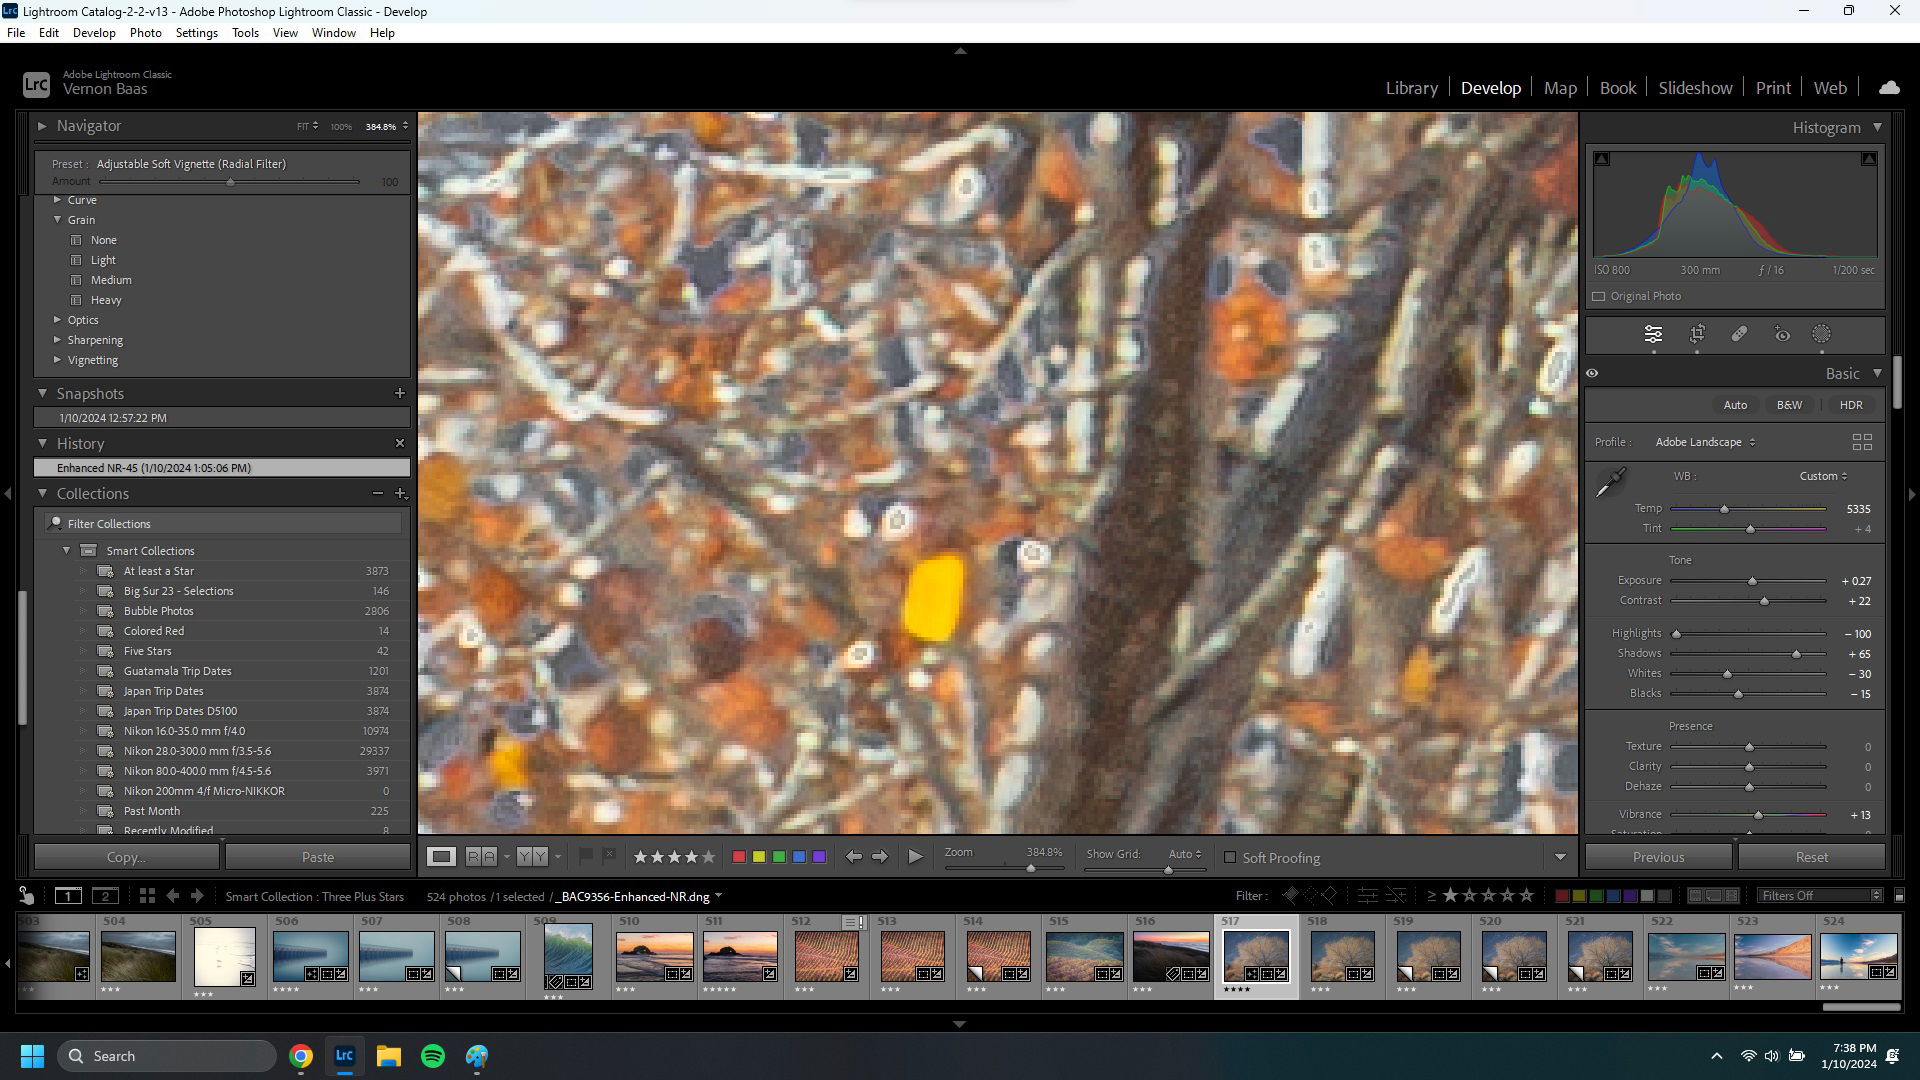
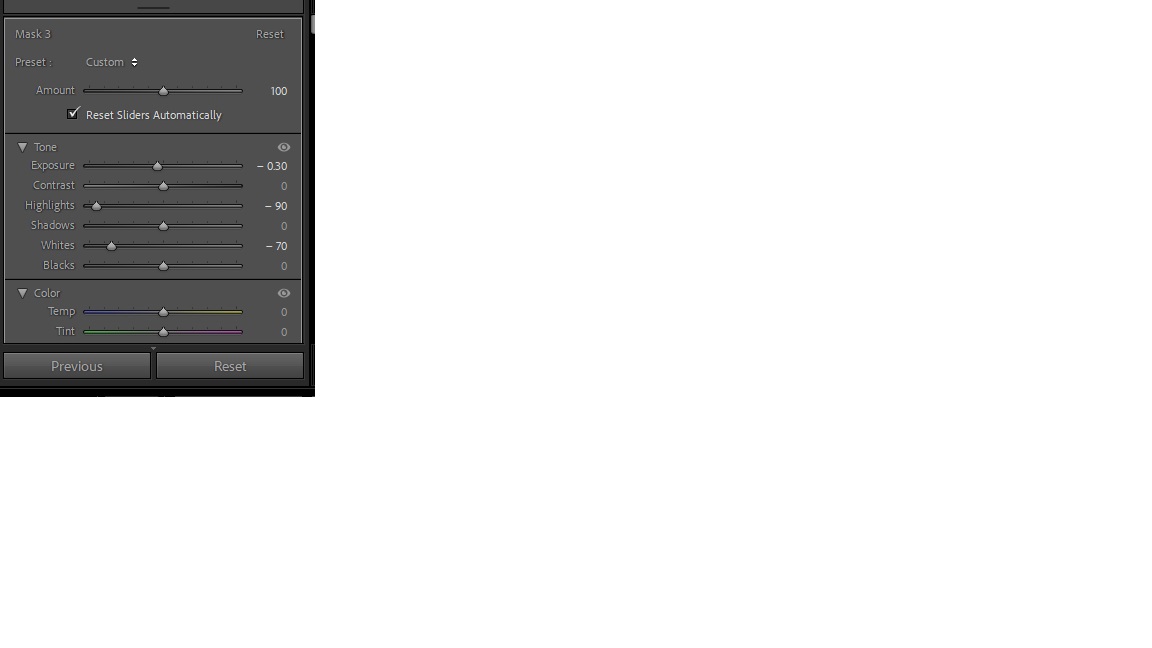
Thanks! Are you able to screenshot the mask adjustments you made? It looks like those artifacts are from pushing the mask too far or not having it be selective enough. Are you using mask intersections for the color or luminance value?
Hi. I am probably pushing the mask too far. However, even when I was using a more gentle approach, I was still seeing some artifacts. I have not tried using mask intersections. I will try to see what I can with that. Thanks for that idea. I haven’t tried working much with the intersections on any images yet. My post processing skills are abysmal and I have decided to challenge myself and dedicate some more time to getting more comfortable with it. My overall vision and goal for the image is to find a complementary and pleasing balance between the tree and its orange and yellow colors and the background. Also, since there already is quite a bit for the eye to explore within the tree structure and branches, I was also striving to make the background as distracting as possible. Thanks for responses and very kind patience.


1 Like
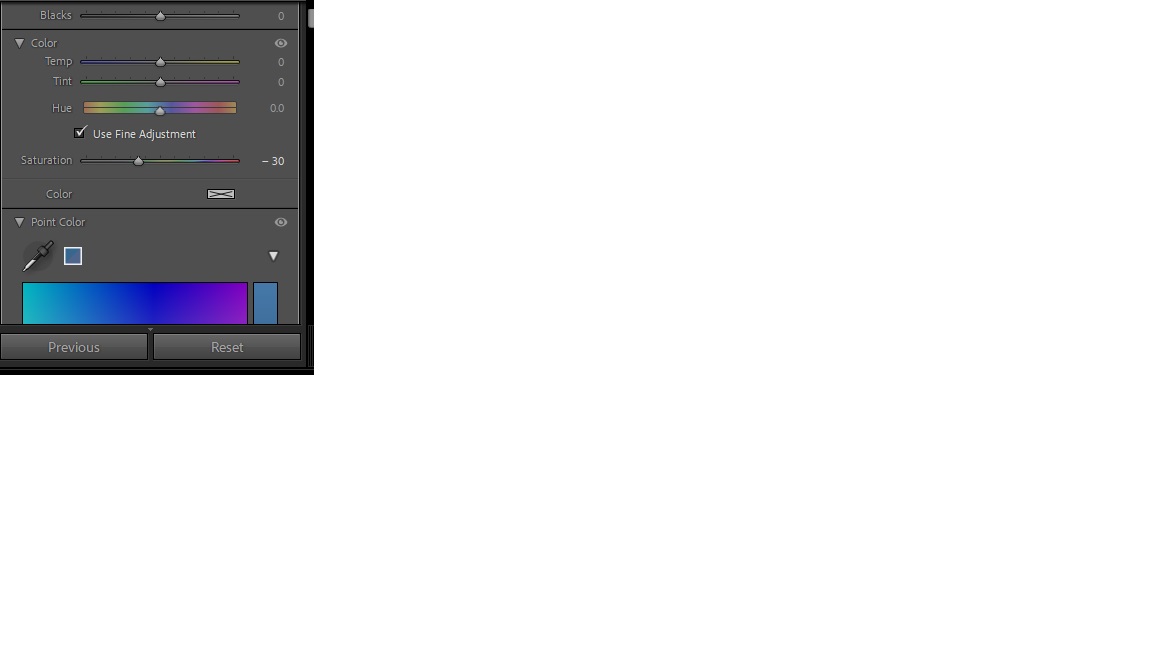
First of all, don’t be too hard on yourself. The fact that you even know about masking makes you more knowledgeable than 80% of other people, so you’ve got a great start! Without having the RAW file in front of me, it’s hard to really say, but I will say it seems you’ve pushed the file really far both globally and in the mask itself. I’ve found that LR is pretty sensitive to those big slider movements and oftentimes less is more. I also wonder if you could expand the range of your blue selection to help a bit with getting all of the right colors. That’s the “range” slider. I see you’re pushing highlights down in both the global edit and the mask… I can’t help but wonder if that’s what’s causing this issue for you. That’s asking a lot. Are you able to share the original RAW?
1 Like
Thanks for the encouragement. The slider intensity is probably related to my growing frustration of trying multiple versions of this edit. ![]() What is the best way for me to share the raw file? Thank you.
What is the best way for me to share the raw file? Thank you.
Just a screenshot of it is good for me ![]()
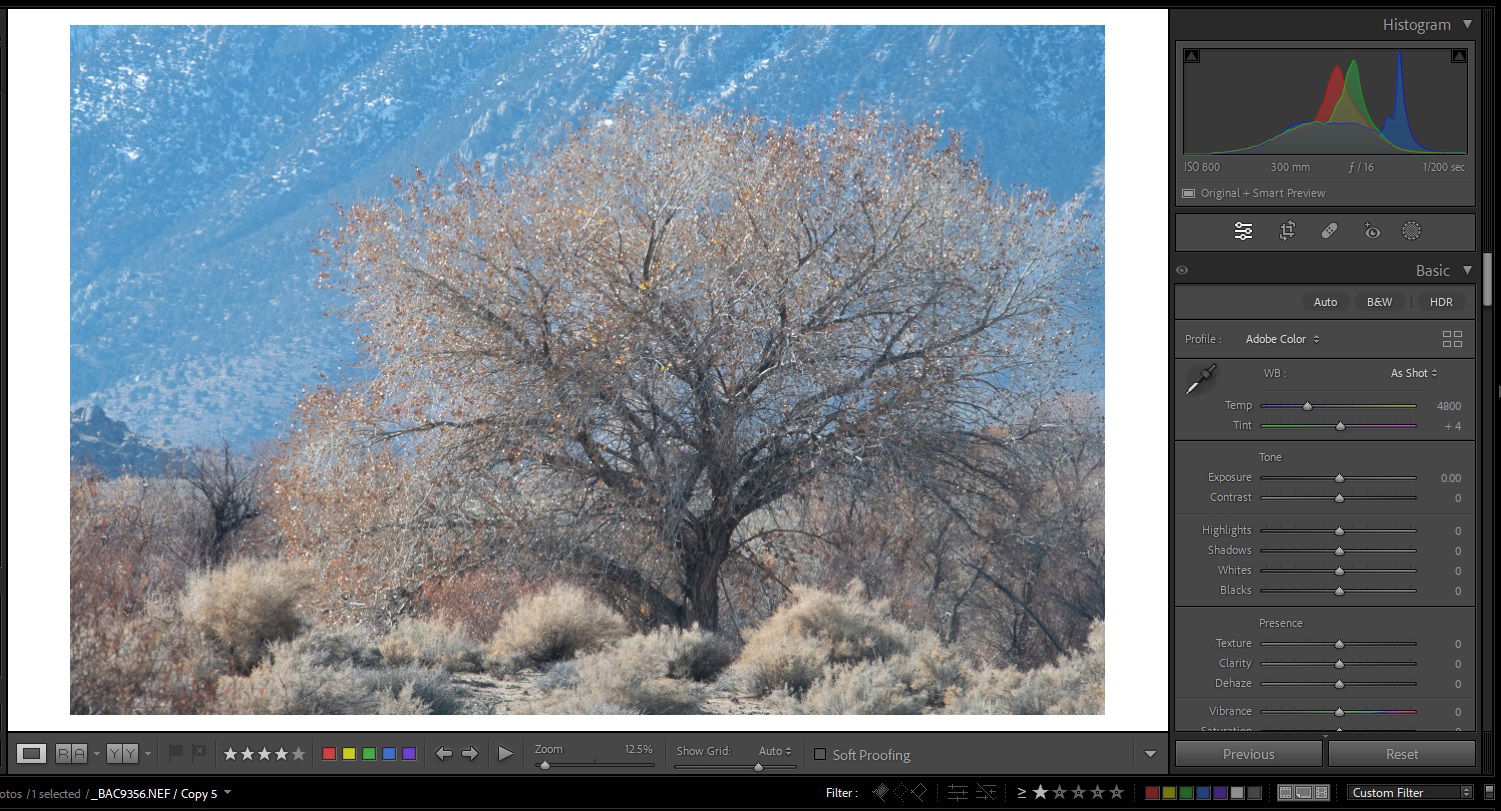
Here is the raw file. And, based on your suggestions, I tried another edit (shown below the raw file) which includes a color range mask that has been intersected with a linear gradient (the background) No artifacts! And, I was more conservative with all the edit sliders overall. I’m sure there is probably an even better way to edit it but at least I did feel really successful this time around! This has been an excellent learning experience. I really appreciate your patient assistance.
2 Likes
Awesome! Yeah, intersecting the mask helps a lot to really dial in what LR is targeting- glad it worked!
1 Like
Are there any resources (written, video etc) you can point me in the direction of for becoming more proficient at using this intersection technique of the LR masks? And, I can of course, just keep practicing on my own images.
1 Like
I’m biased because this is who I work with but it’s solid content and updated regularly.
1 Like
Thank you. I will check it out.