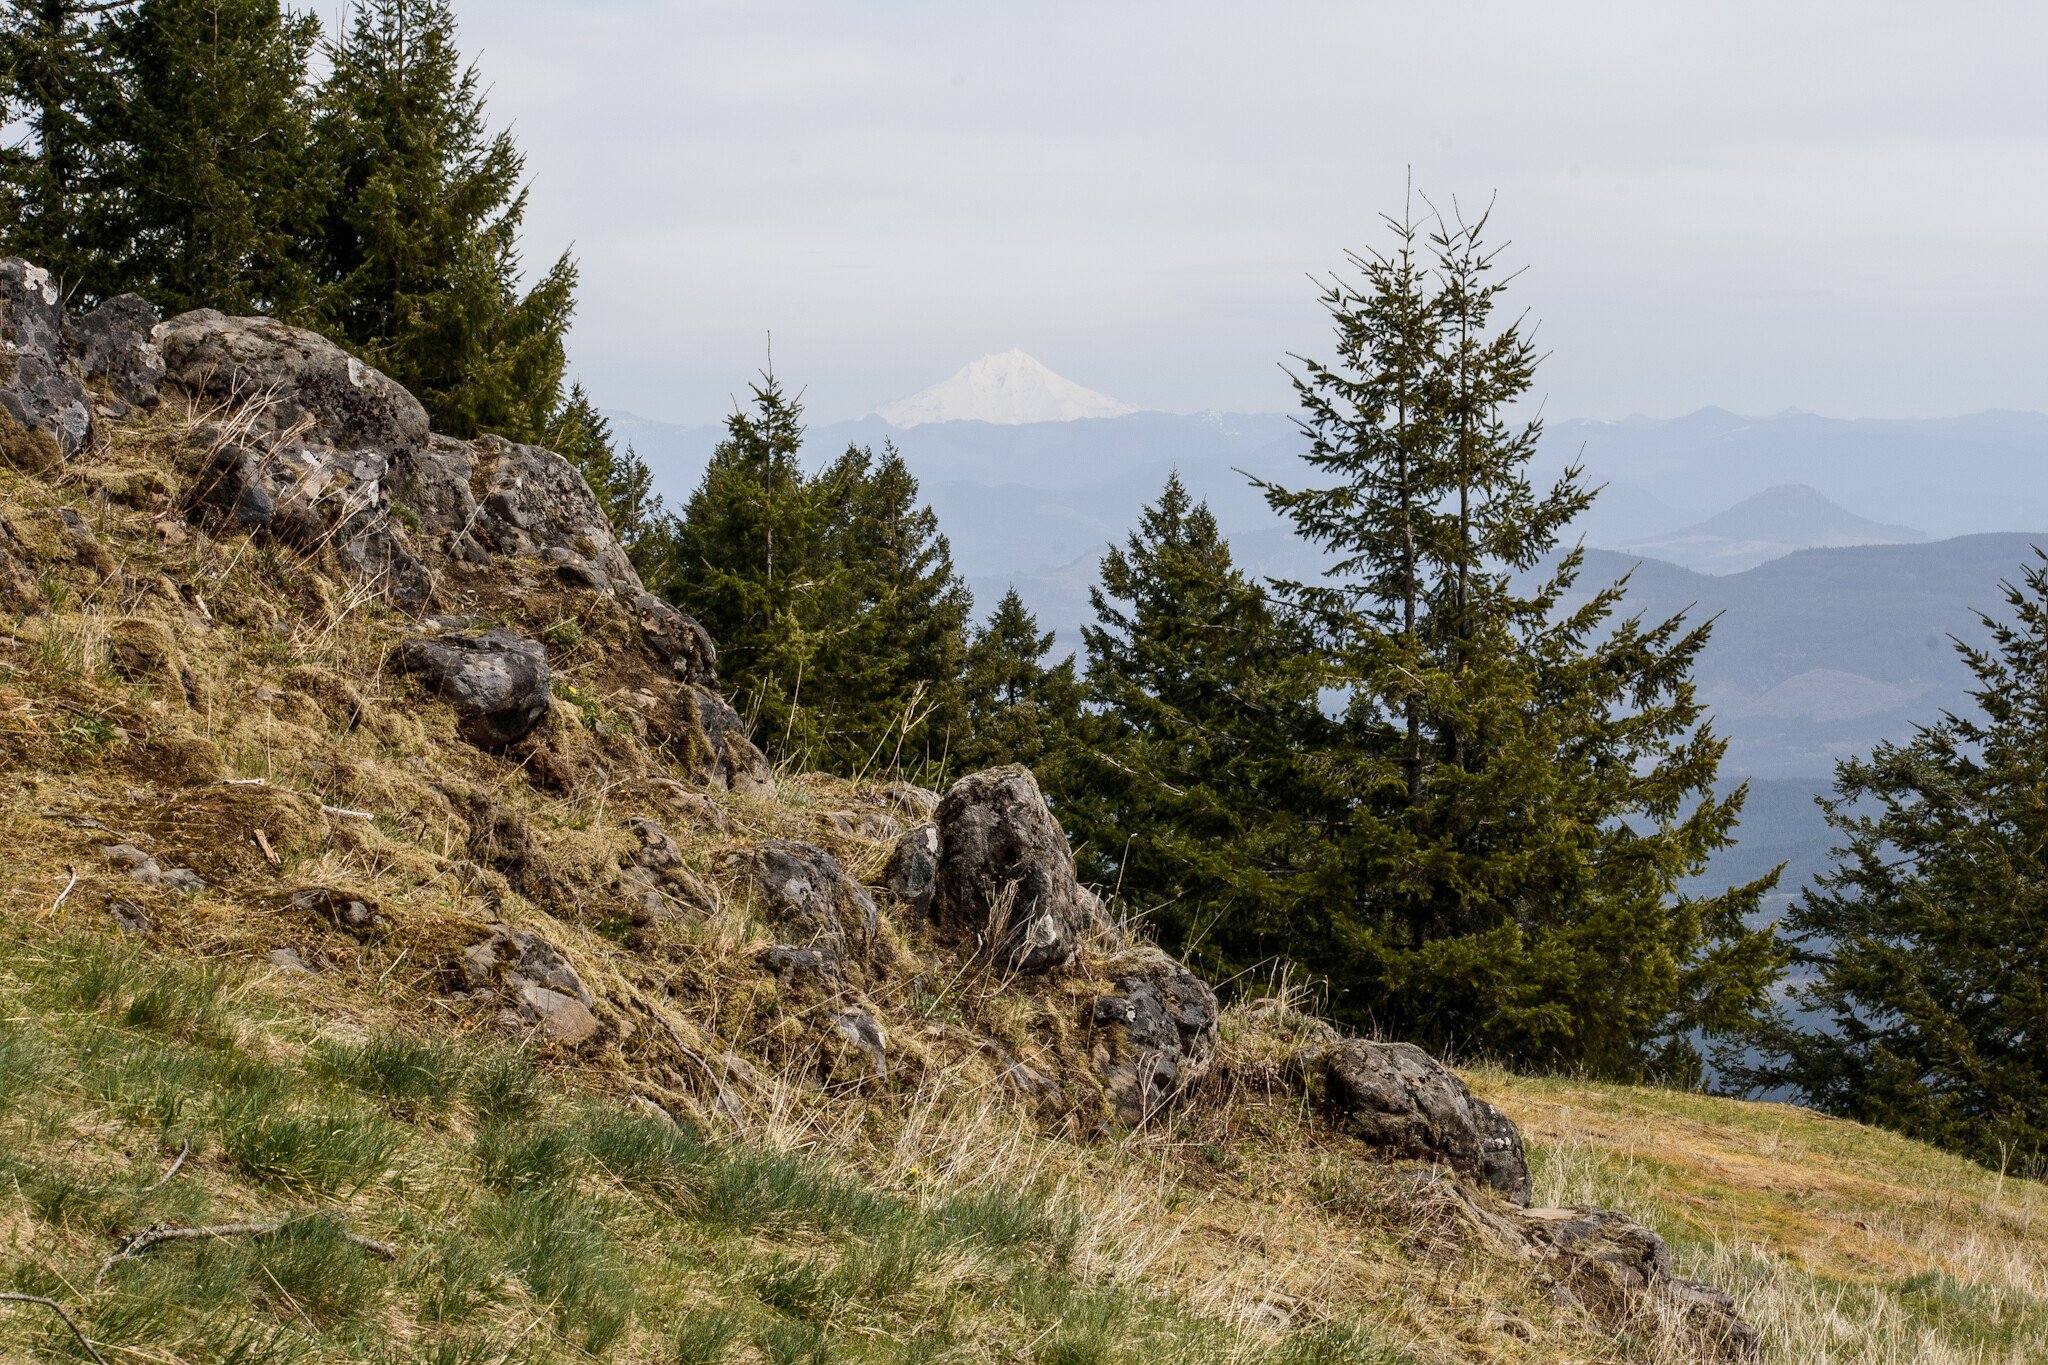
View of Mt Hood from a hike I took on Horse Rock Ridge end of April. I didn’t even know I would be able to see it from up here, especially from this angle. It was a pretty hazy view, but I wanted to try shooting it anyway. I liked the foreground grasses and rocks and the distant hills.
Specific Feedback Requested
How’s my depth of field? Composition? Of course anything and everything!
Technical Details
Is this a composite: No
Nikon D3400
70mm
f/22
1/50
ISO 100
Cropped to 11x8 and did minor adjustments with exposure, shadows, blacks,whites, to try and bring out the outlines of the foothills more and Mt Hood as best as I could.
I like the feel of the mountains and the colour is spot-on. However, I struggle a bit with the composition. The foreground dominates the nice blue vista on the mountains in the distance, making them a bit of an afterthought. The eye, which scans images from let to right, has nothing to stop it from losing itself to the right. I would love to see this scene with a more balanced composition.
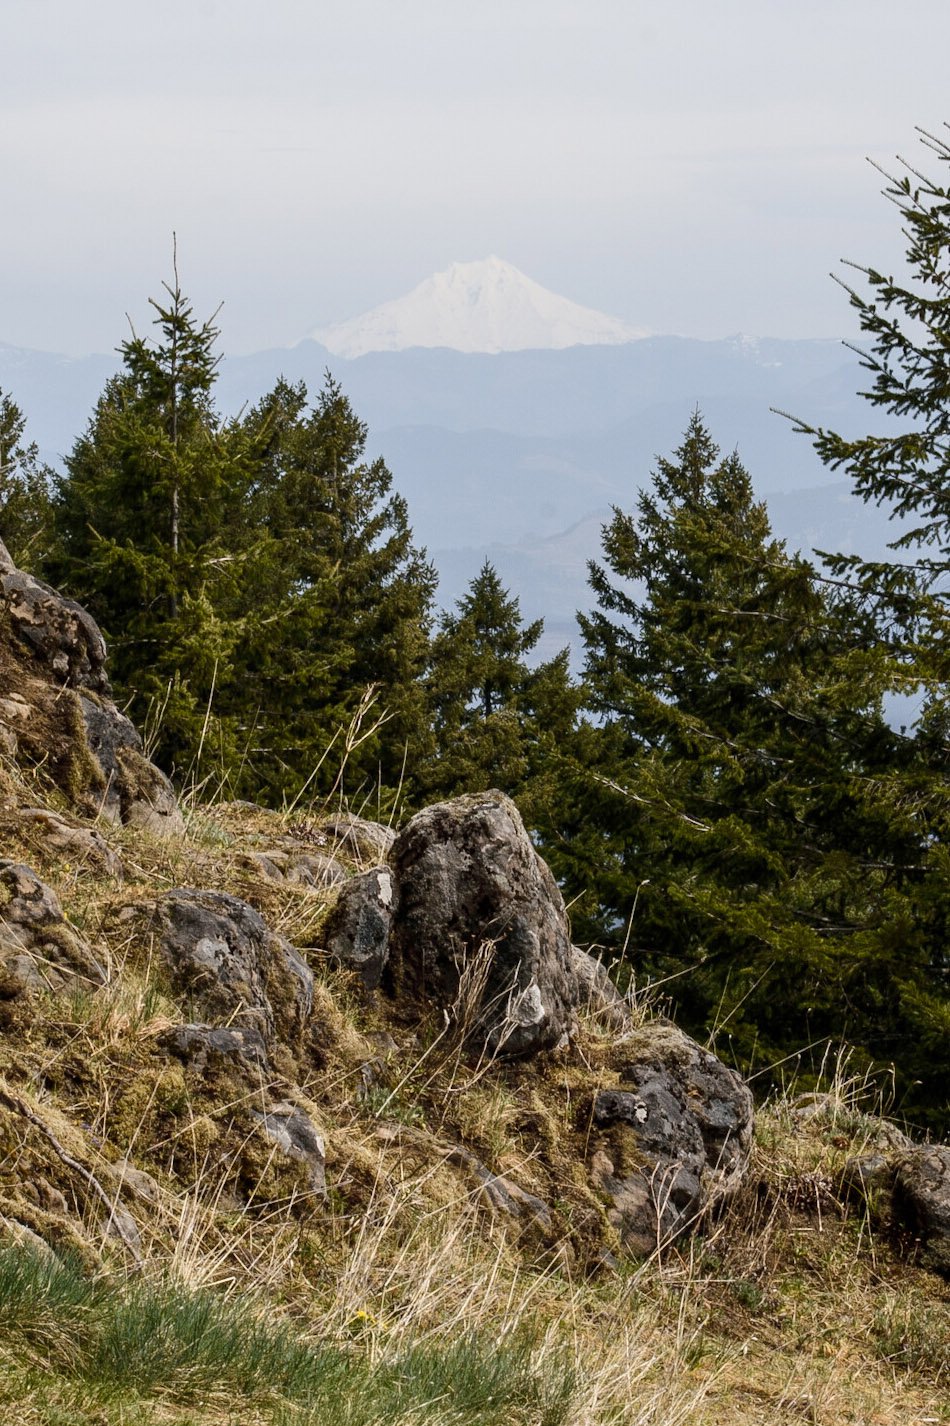
Thank you, so much @jaapv and @Michael_Lowe for looking and your feedback, so I just wanted to show you the original size image and what I had cropped, maybe it looks better this way? Or maybe with the angle of the hill I was on I couldn’t really get a properly balanced composition and therefore maybe it’s not really a photo that works? I’m interested in your thoughts….
And just in case you want me to move to the right, here is an image I took of Mt Hood further to the right, as you can see from the trail I was on there weren’t a lot of choices of vistas with foreground ….
Mountain vistas are difficult. Either you need a small contrasty foreground to emphasize the haze and the distance or you have an object of real interest and the mountain is just the back drop. A longer lens would have helped to get Mount Hood more prominent. Your idea to use the trees as framing is excellent, they are just a bit too dominant.
BTW it is not a good idea to use f22; you lose quite a bit of sharpness through diffraction. The diffraction limit of this camera and lens @. 70 mm is f 8.0.
Thanks @jaapv for your help and advice. I don’t totally understand what you mean about diffraction… For some reason I thought that a smaller aperture would help with sharpness and depth of field. But am I to understand that f/8 would be the smallest I’d want to go at 70mm? And then if I zoomed out to 300mm would I want my fstop even larger? I had taken a photo of Mt Hood and other mountains at 300mm but they looked really hazy still, was it because I used too small of an aperture? It was a very bright but hazy day. Oh, one more question, how do I find out about diffraction limits? Because I have another lens that is 18-55mm, I don’t use it as much but I would like to know how to use the aperture properly for that too. Thank you, so much, for letting me know about that.
With small physical aperture diameters the light will “bend” around the edges of the aperture blades. This will introduce unsharpness This is called diffraction. The point at which this starts to happen is called the diffraction limit. In this case f 8.0. Some lenses are so sharp that their sharpest opening is wide open. We call this a diffraction limited lens. Any stopping down will decrease sharpness An example is the Leica APO-Telyt 280 4.0. In general most lenses are at their best stopped down two stops and start to fall off visibly around f 8.0 on APS or Full Frame. You can find diffraction calculators online. That does not mean that you should never stop down more, sometimes you need to, despite a slight reduction in image quality. However, if you want deep DOF you are better off using a technique called Focus Stacking. You take a number of images focused at different distances and blend them together in Photoshop -Photomerge.
Your mountains looked hazy because they were hazy. You can use this to good effect if you have a few sharp branches in the foreground. Using the “dehaze” slider in Lightroom or ACR can mitigate the effect but don’t overdo it.
I don’t have PS but I guess what you’re saying is that composites are sometimes the only way to get a grand sweeping landscape image. Not that this is, but I would like it to be!
Vanessa, @jaapv has given you some excellent advice , and I agree with everything he has said. If you think about many classic landscape compositions that feature mountains, you often have an interesting element in the foreground, a clearly defined mid-ground to help create a sense of depth, and the mountain in the background. I think in this image the mid-ground (the trees) becomes too dominant and to some degree is too close to the foreground, such that they almost merge together, which works against creating depth.
I do like your idea of using the trees to frame Mt. Hood, that concept does work. Another possible idea of how to work this scene might have been to get much closer to the boulders. Using a wide angle lens and avertical composiiton, you could have made the boulder a prominent foreground, the trees as a midground (and frame), and then Mt. Hood in the background.
Here is a rework that illustrates the concept. However, if you had gotten closer with a wide angle, it would have made the perspective less compressed and the boulder would separate more from the trees than it does in this crop from a 70mm shot does.
Hi @Ed_McGuirk! Thanks for taking a look and your feedback! I like your crop, I see that with your crop it makes a more balanced composition like what I think @jaapv was saying it needed. I had my short 18-55mm lens with me but felt that the mountain was so far away it would hardly be seen. I had tried using the shorter lens at some other angles and views, but for some reason the end result wasn’t what I was looking for. I probably need a lot more practice with it, because I always default to the long lens! Thanks again so much for your help!
If this is someplace you can easily re-visit, there is definitely potential here. Shoot a vertical. Try going wide (16 or 18mm), get down low and really close to the boulder (like 3 feet away). The wide angle lens will distort the perspective of the boulder, really emphasizing it. This is the classic David Meunch near/far approach to composition, which he popularized back in the film days. Like in the Alpine Floral image, note his strong use of foreground, mid-ground, background.
Thanks you so much for that reference @Ed_McGuirk , this place isn’t too close, a few hours away. But I could see myself going back, especially because you’ve given me something to work on! That makes me excited!
Oh, okay @Igor_Doncov so I guess it’s just a technique that can apply to any scene, like a small scene like @Ed_McGuirk waterfall, I really like that one too!