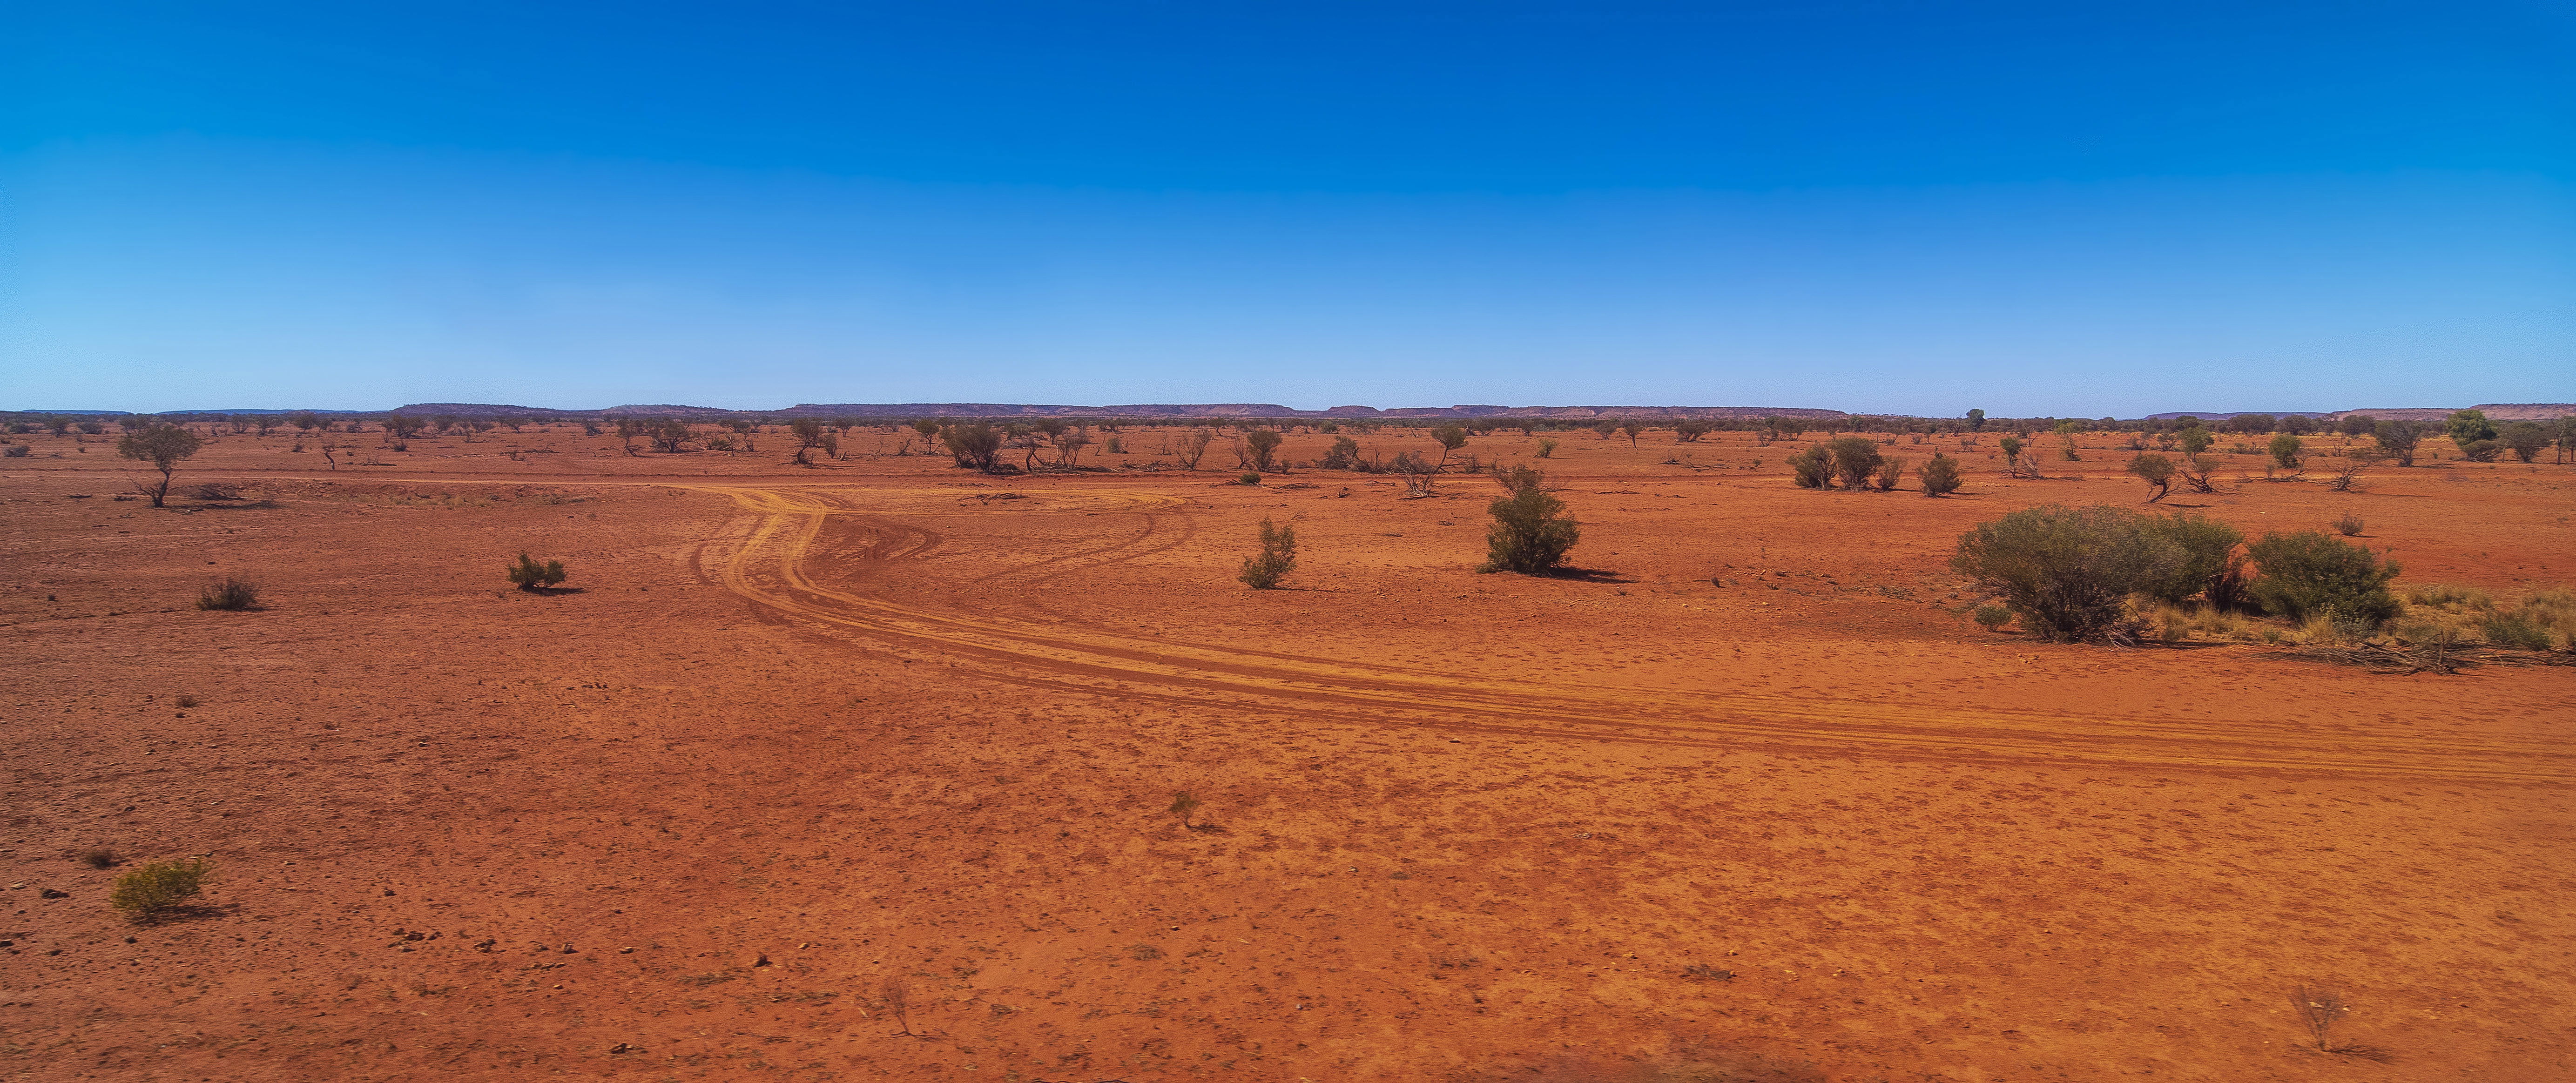
I like the starkness of the desert in this South Australia outback scene and am looking for further advice on post processing. I have experimented with cropping the sky, but I think the image loses impact when cropped. The curved tracks are central to the composition. This almost breaks the rule about splitting images in half with the sky. That does not bother me.
How would you improve this further in LR or PS? All ideas are appreciated. Thanks.
What artistic feedback would you like if any?
All
Pertinent technical details or techniques:
(If this is a composite, etc. please be honest with your techniques to help others learn)
Shot through a double window on a moving train, placing the lens up against the glass. Nikon D500, 400th of a second, at 12mm, f8.0, ISO 200 with Tokina 12-24mm lens.
If you would like your image to be eligible for a feature on the NPN Instagram (@NaturePhotoNet), add the tag ‘ig’ and leave your Instagram username below.
You may only download this image to demonstrate post-processing techniques.
The simplicity here is key and I think makes this image stand out. The colors, oh yeah, great combo with the red/orange and blue - the blue in the sky looks processed perfectly to me. And I agree that in this particular scene cropping the sky any further would be a detriment. BTW, I don’t view this as a 50/50 horizon split - the reddish earth with the curved tracks help move the eye through the frame.
I think this is quite excellent actually - and a great story-telling image depicting the vast openness of the outback.
Larry, this does tell a nice story about the vastness of the outback. The tire tracks leading off into the vastness is what makes that story work. My comments would be similar to Lons, I like the orange/ blue color combination, and I don’t see this as a 50/50 horizon either.
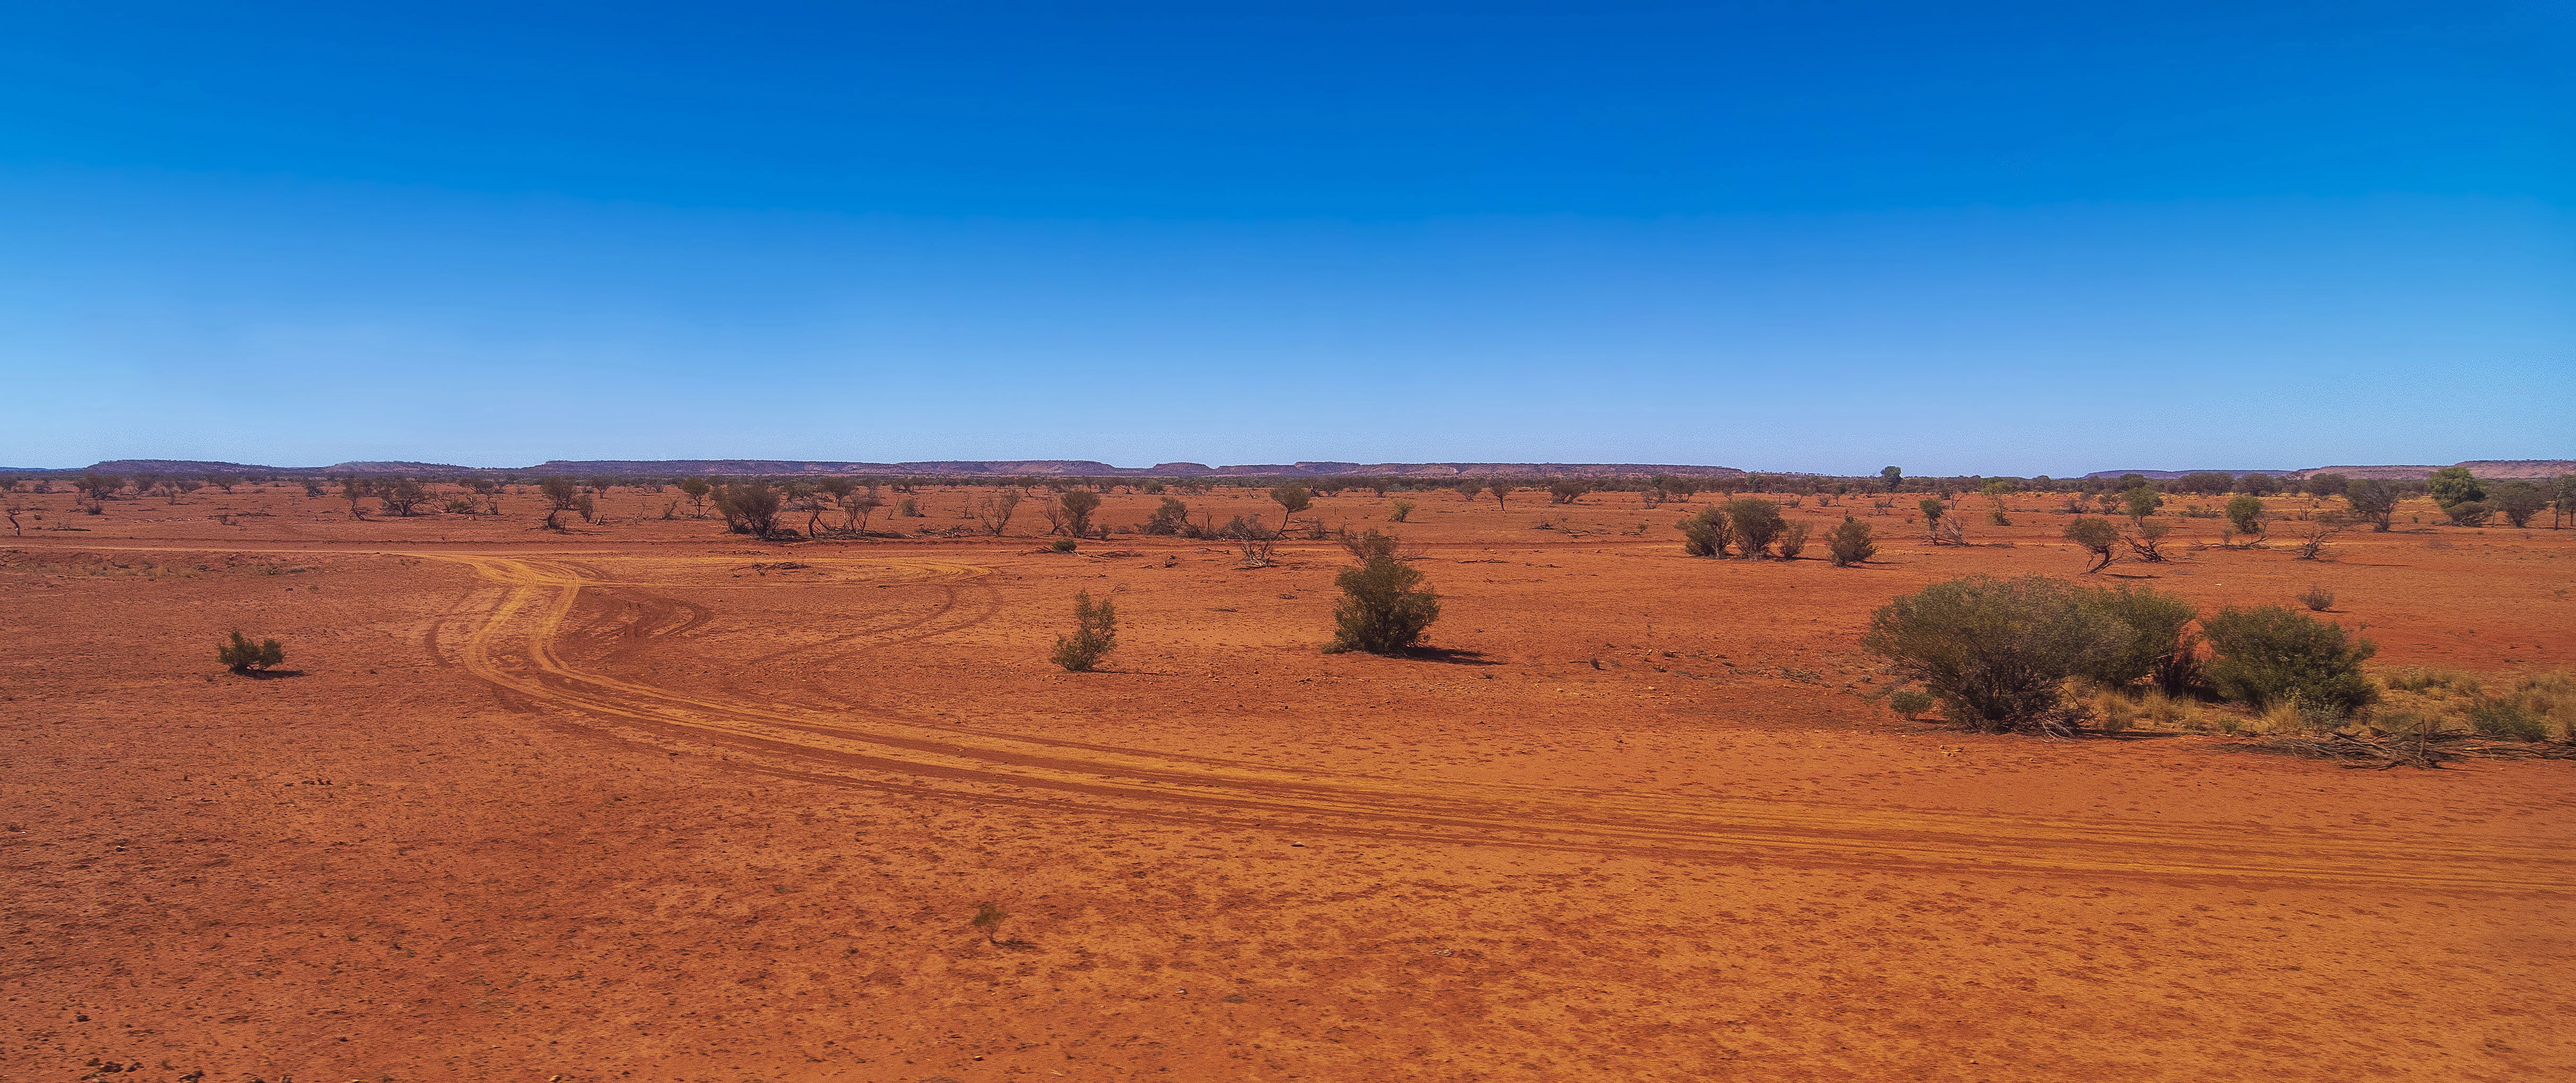
But the "rule " about 50/50 split horizons is only a guideline, and sometimes one can break the rules successfully. I would offer up this rework as possibly being an example of that. This essentially has a 50/50 horizon, but what I like about this rework is that it places more emphasis on the tire tracks, without losing much of a sense of vastness.
I think this is one of those images that doesn’t require much processing. Your processing looks fine to me as you’ve captured the great blue red colour contrast in the Aussie outback.
I remember processing some sunset or sunrise shots from the outback and I de-saturated the reds as the natural glow in the rocks didn’t look believable to those who haven’t been there
Thanks, Lon, Ed, and Nathan. I appreciate your confirmation that the image works well. Ed, how did you add to the sky? And, it looks like you have added some saturation to the ground. I like what you have done and would appreciate your details, so I can adjust the image correctly. Thanks. Larry
Ed, how did you add to the sky? And, it looks like you have added some saturation to the ground. I like what you have done and would appreciate your details, so I can adjust the image correctly. Thanks.
I did not add any sky, I merely cropped some away from the left and bottom of your original image. This makes it appear as if the sky fills a larger portion of the frame, because on a relative percentage basis it does. I also did not make any color or saturation adjustments to your image, whatever change you are perceiving must be due to how a revised sky/land ratio makes the picture appear, and not to any actual saturation/color changes.
Regarding your rework, I wish you that you had left a little more space beneath the right side of the tire tracks for a little more breathing room. But this gets into pretty subjective choices, and is a matter of personal preference.
If you would like to add sky in photoshop go to image->canvas size and increase the canvas at the top of your image.
Then you can use the rectangular marquee tool to select the empty canvas area and a little bit of the sky. Once you’ve made the selection right click and choose fill and then content aware. It works well for areas that aren’t too complex.