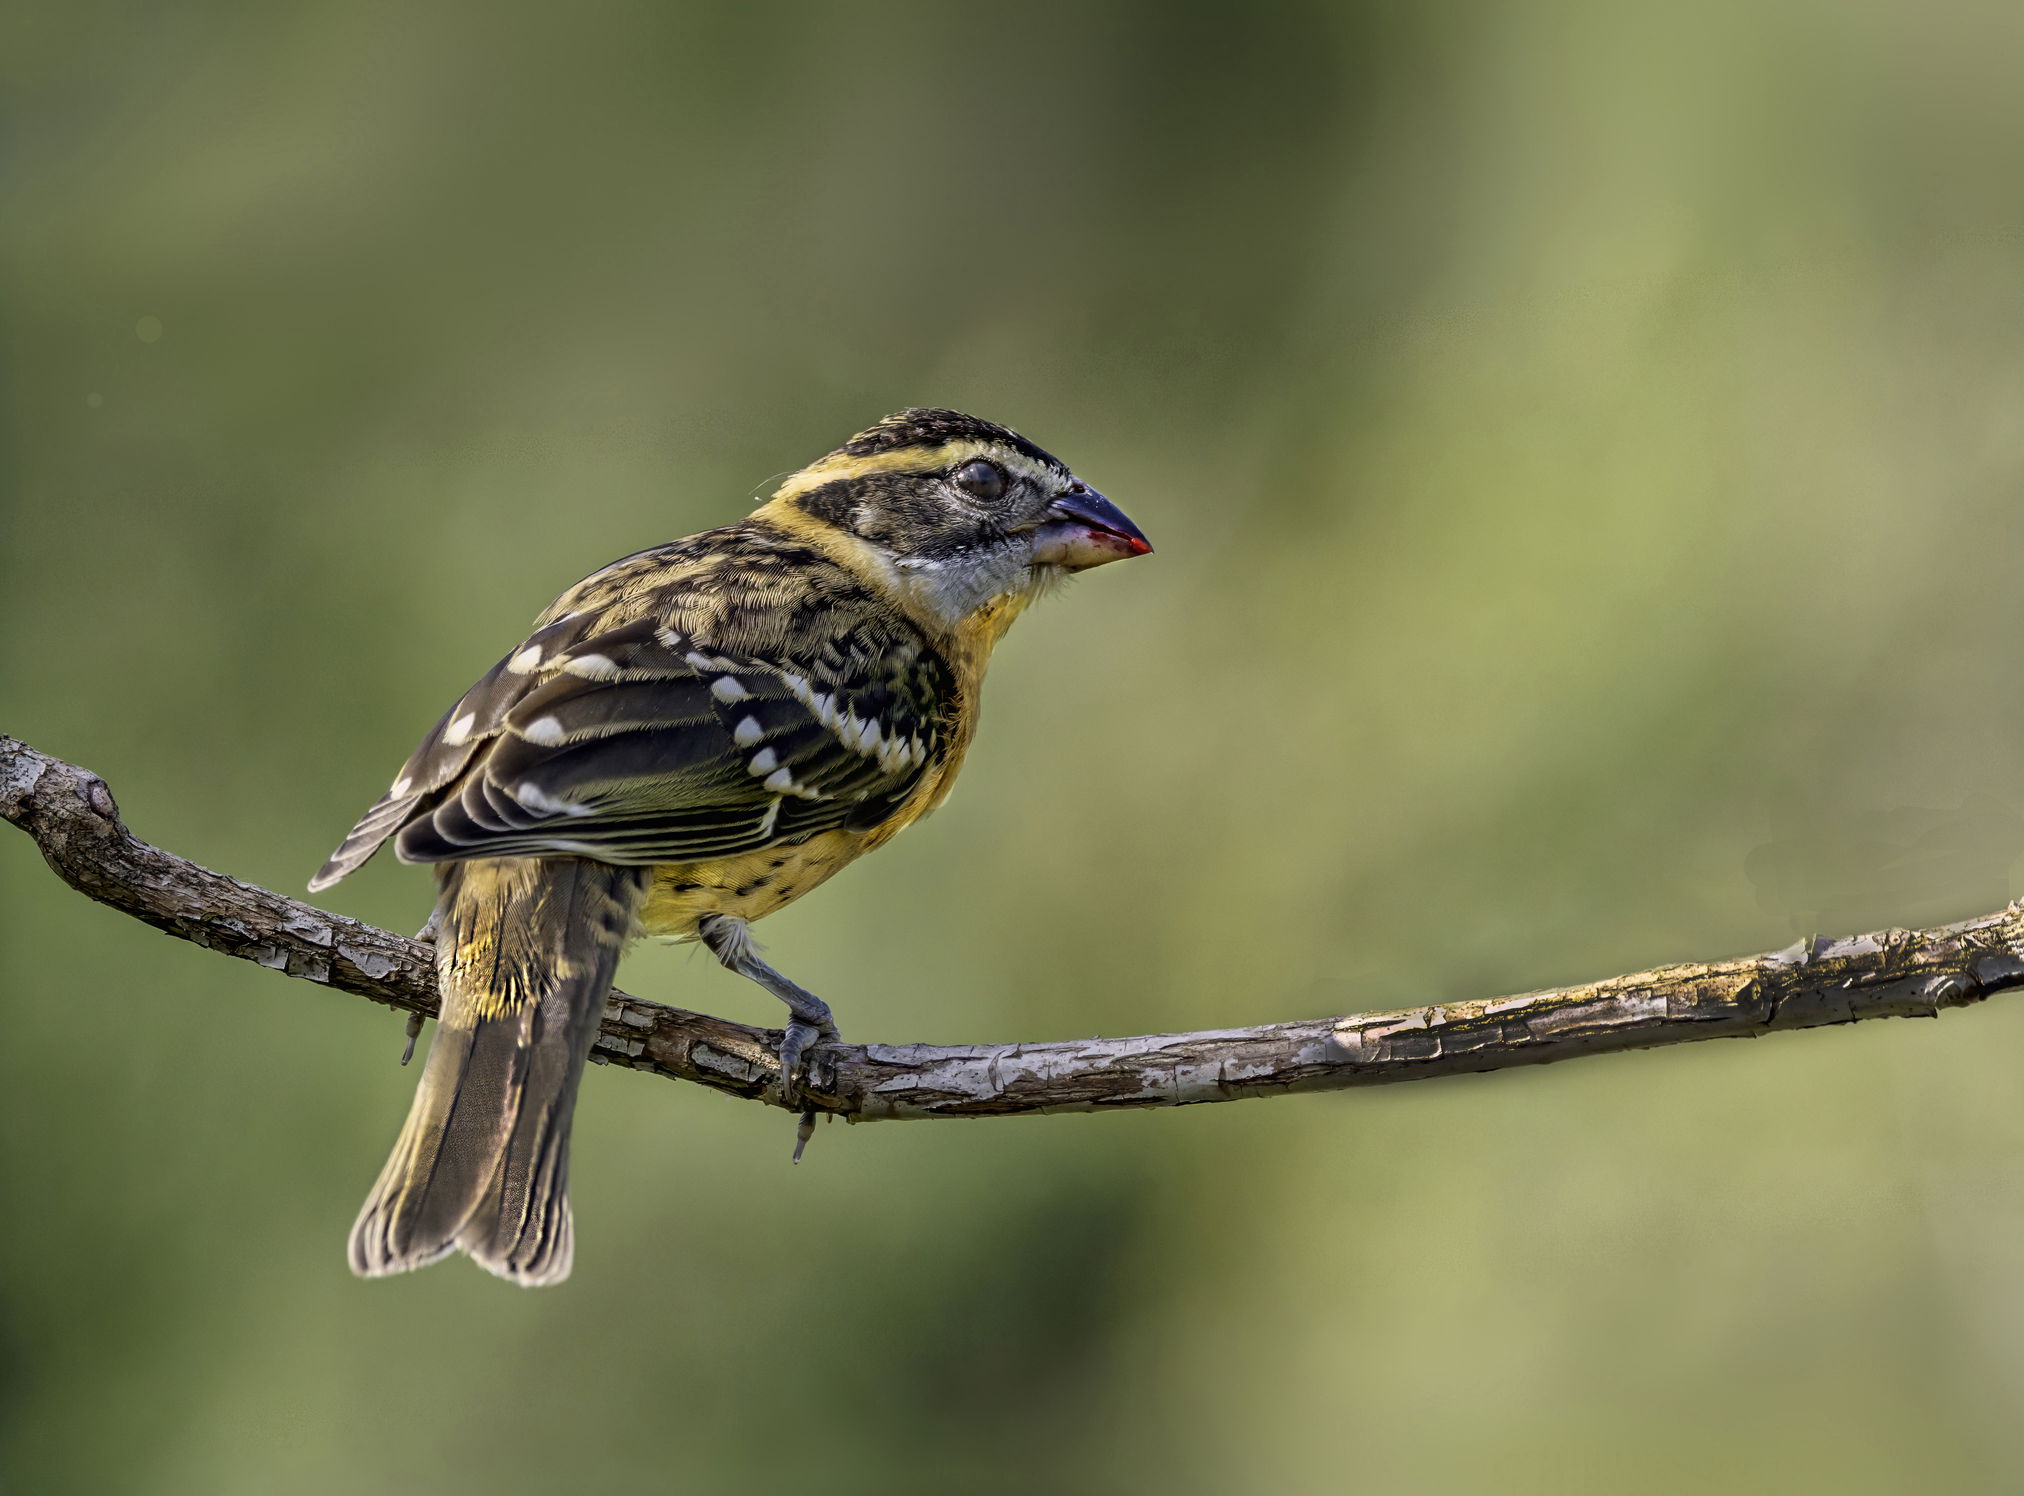
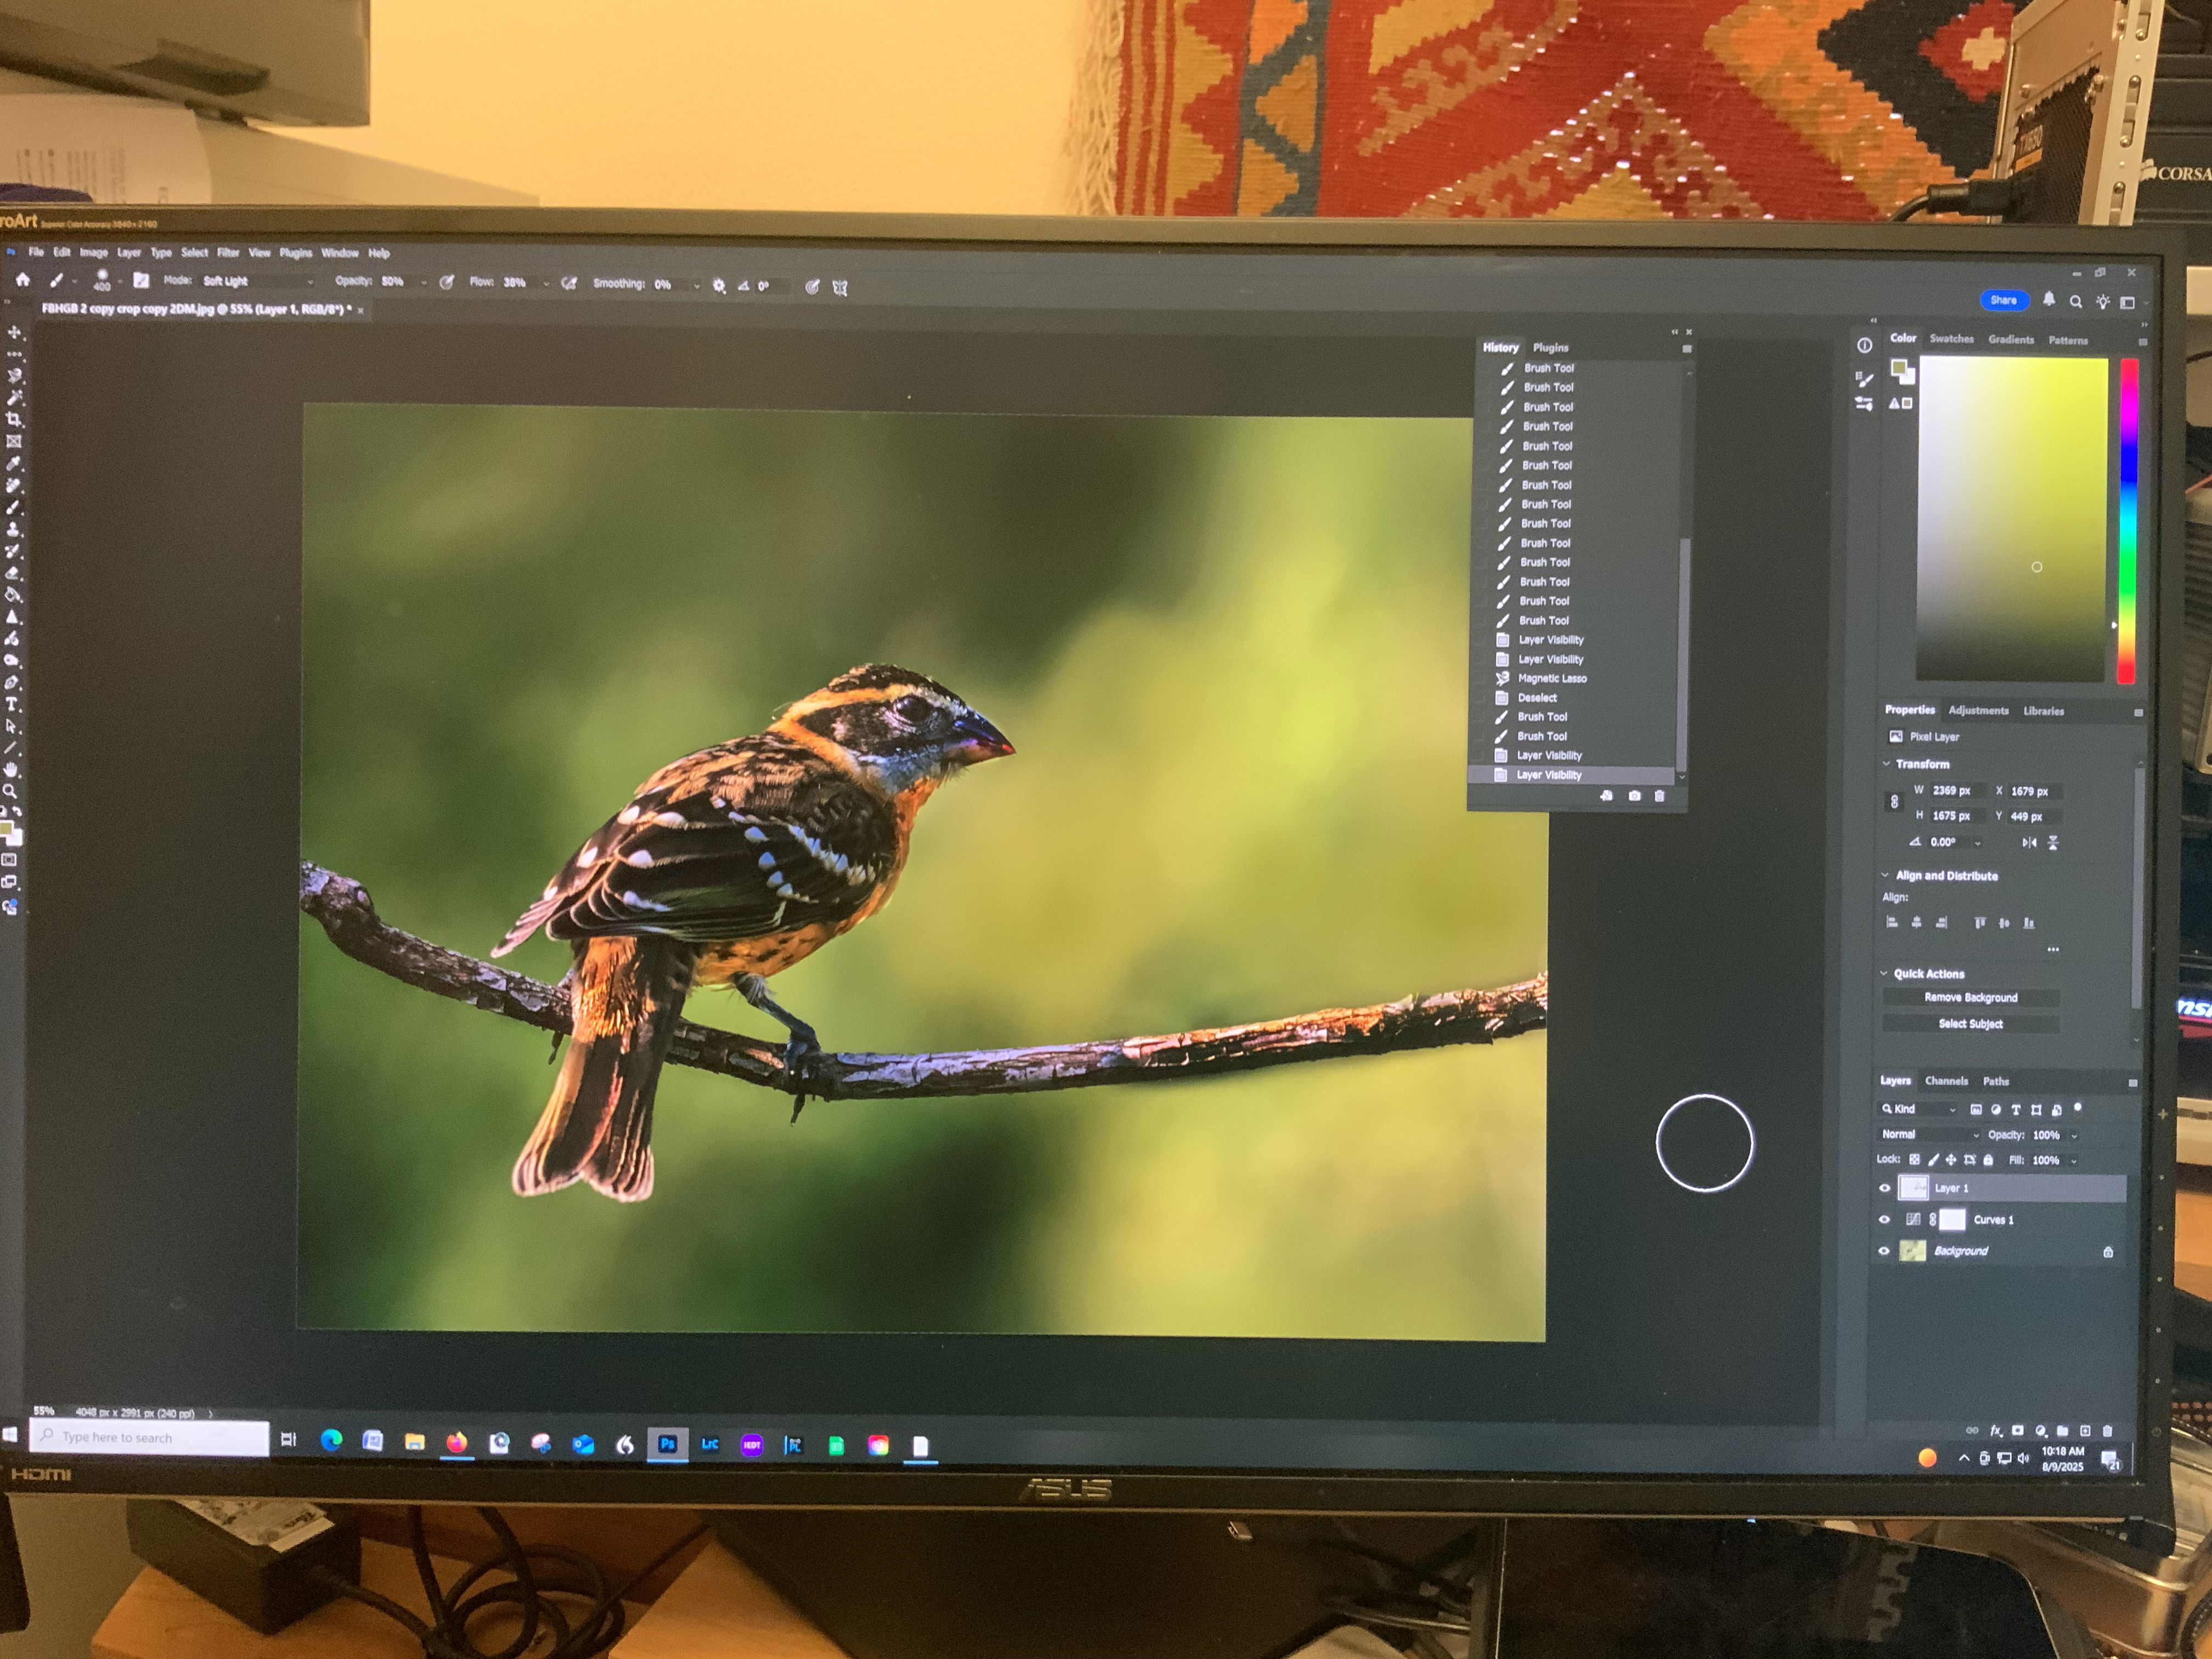
A gorgeous capture with great detail and a lovely BG. There are still some cloning artifacts toward the right side of the branch. I don’t know how much stuff was removed but the new selection tools in both LR and PS can be quite good. A clean selection of the branch could be inverted to protect it and then the BG cloned, working down to a ~50% opaque brush to smooth things out as needed. If that is too difficult with dexterity issues, there might be options to replace part of the BG with AI. Again, select the branch, invert, roughly paint away all but the problematic areas with a large brush, and see what happens with Generative Fill. You can have it keep generating options and choose the one you prefer. It can be uncanny sometimes.
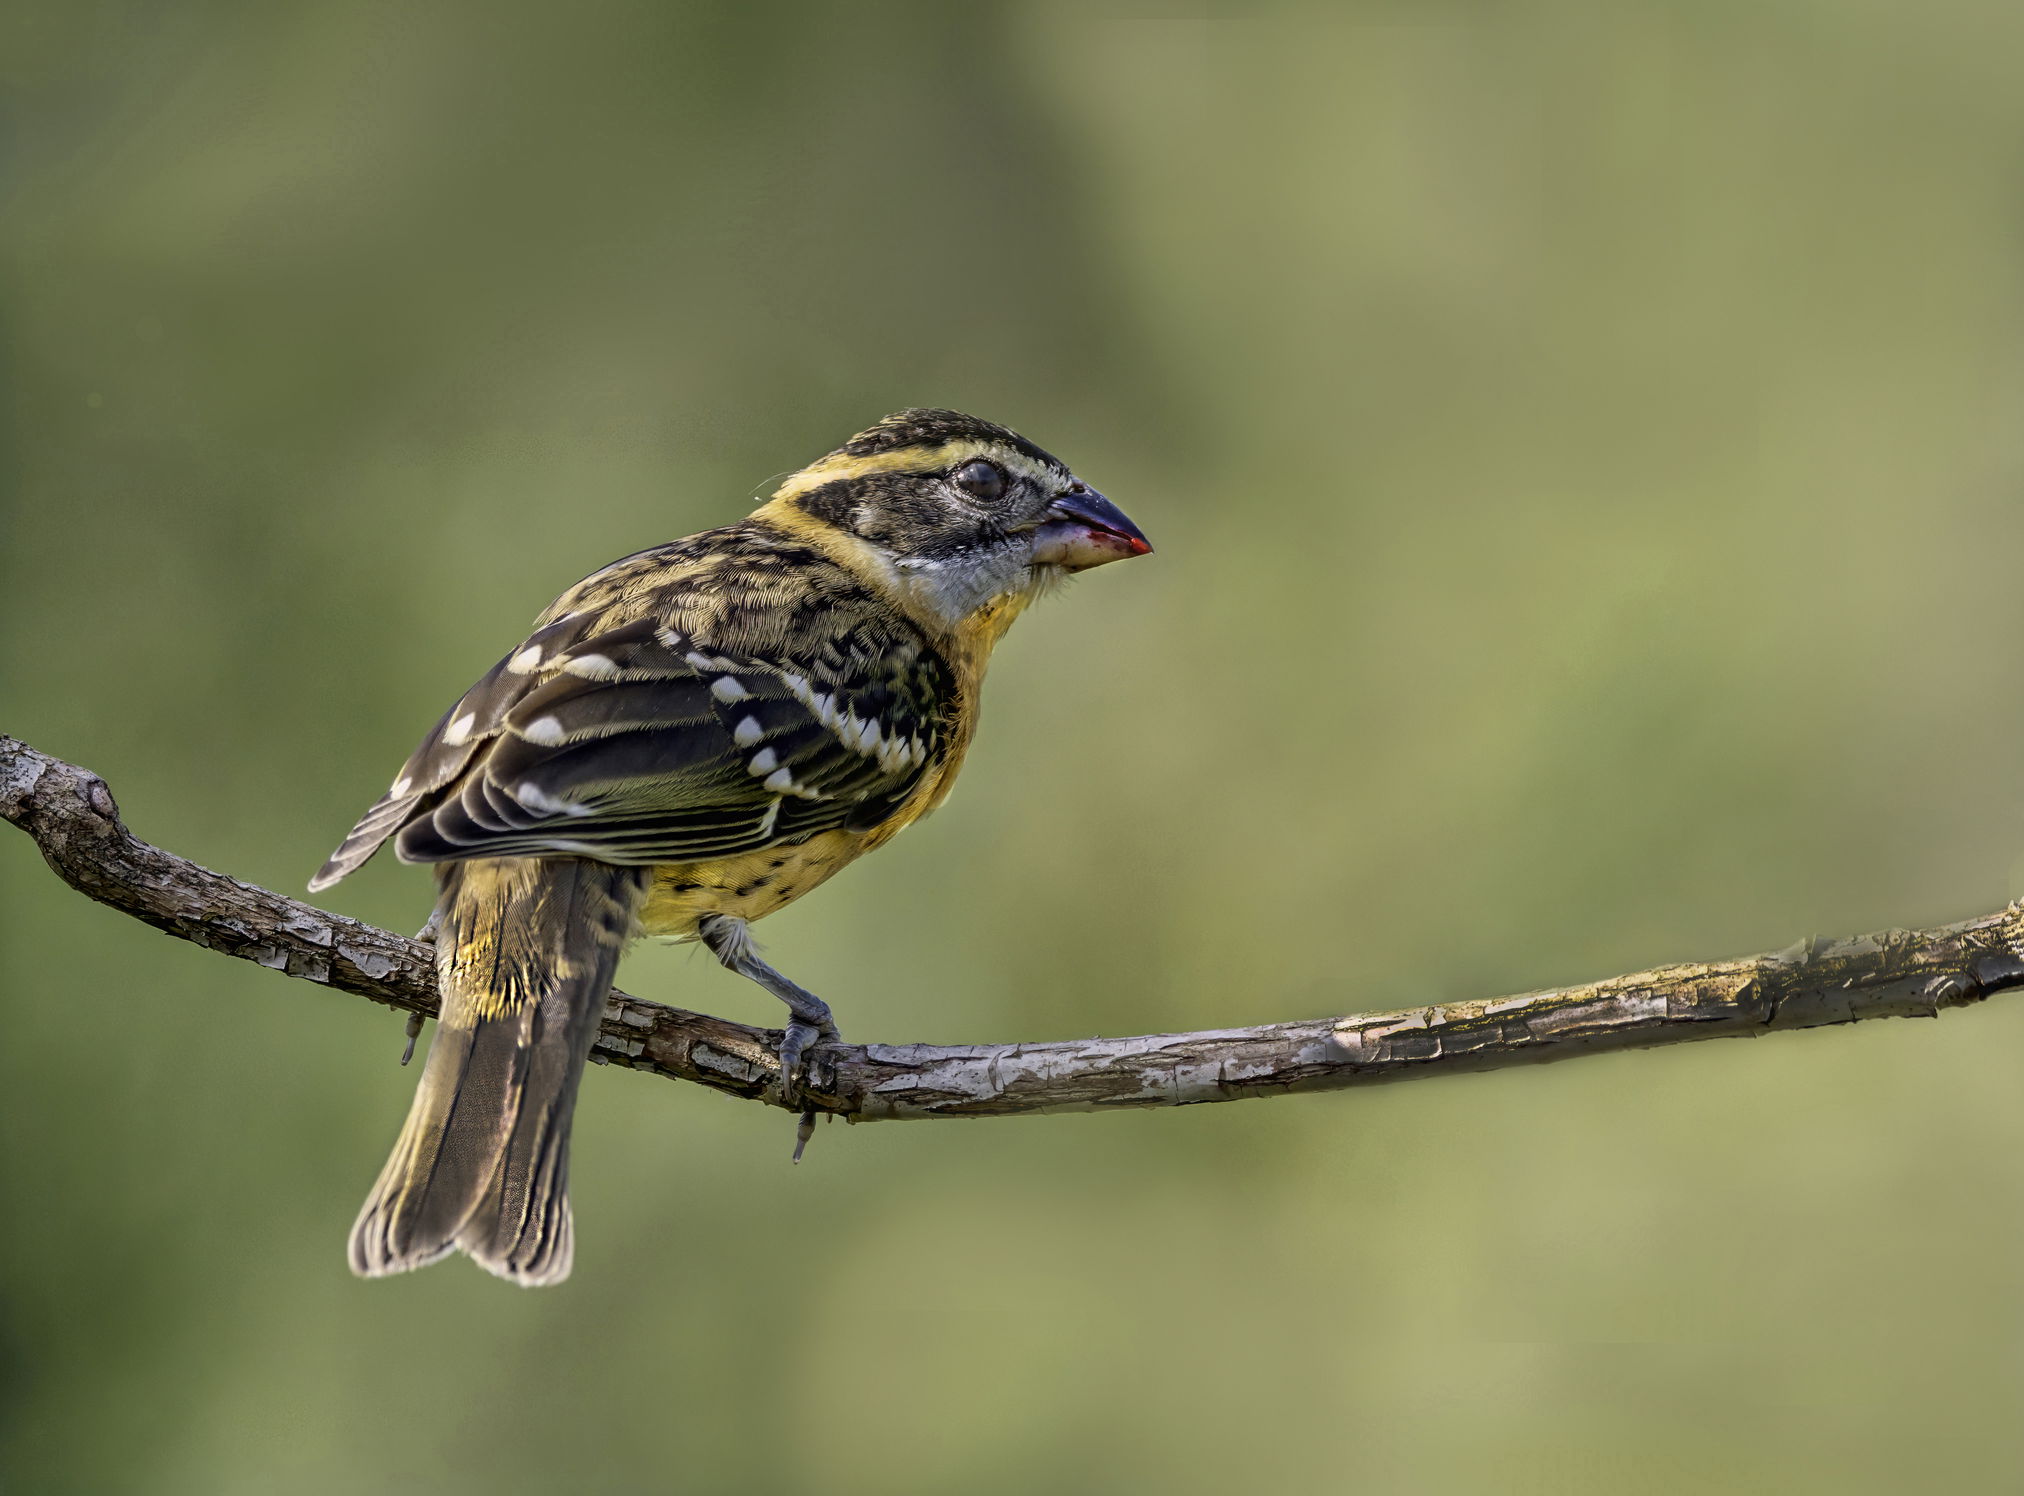
What a cool looking little bird. I love the red (berry eating?) stain on the beak. The bird has given you a lovely over the shoulder pose.
Sandy has mentioned the opaqueness of the eye due to the nictitating membrane. I like her suggestion.
I still see some cloning smudges on that branch and know how frustrating that can be. I really like the crop as posted, but there could be another version if you slice off a piece off the RHS and a slither off the left side to position the bird nicely in the frame.
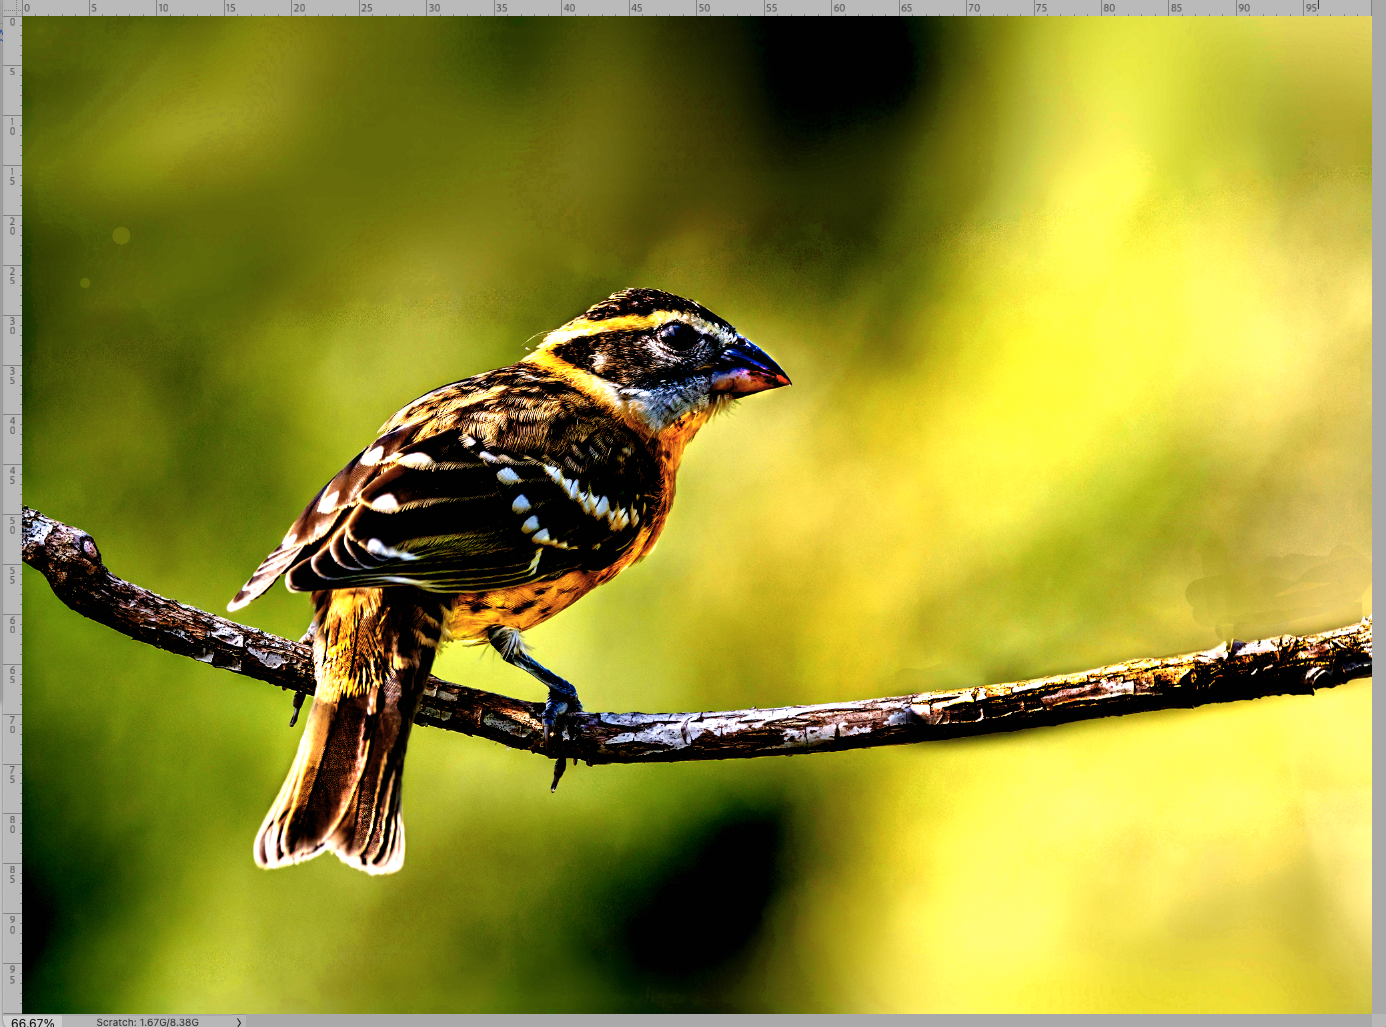
I’m using a round brush at 50% opacity. I don’t quite understand how you smooth out some of the areas that you wanna smooth out. I’m a little confused on how to do this. Well, I had originally done on this image is to darken the bright spot on the right side of the stick. The only place the sun was hitting it.
This isn’t a uniform pattern in the background. I’m not quite sure how to do the blending to make it look realistic.
Ideally, you want some texture in your background. But there are places where just transitions and it looks like someone’s gone over it with a smudging brush.
I think the bird is fine. There’s nothing that I would do any differently on the bird. But there are places in the background that don’t look realistic, and I’m not sure how to deal with it.
I’m using the quick selection tool and I inverted it. There’s still places that I really don’t feel I’m able to get a smooth transition as I want.
Anyhow, thanks for your help on this.
By the way, this image was shot in 2016. Nikon d500 and probably a 200 to 500 tele photo.
David Schoen
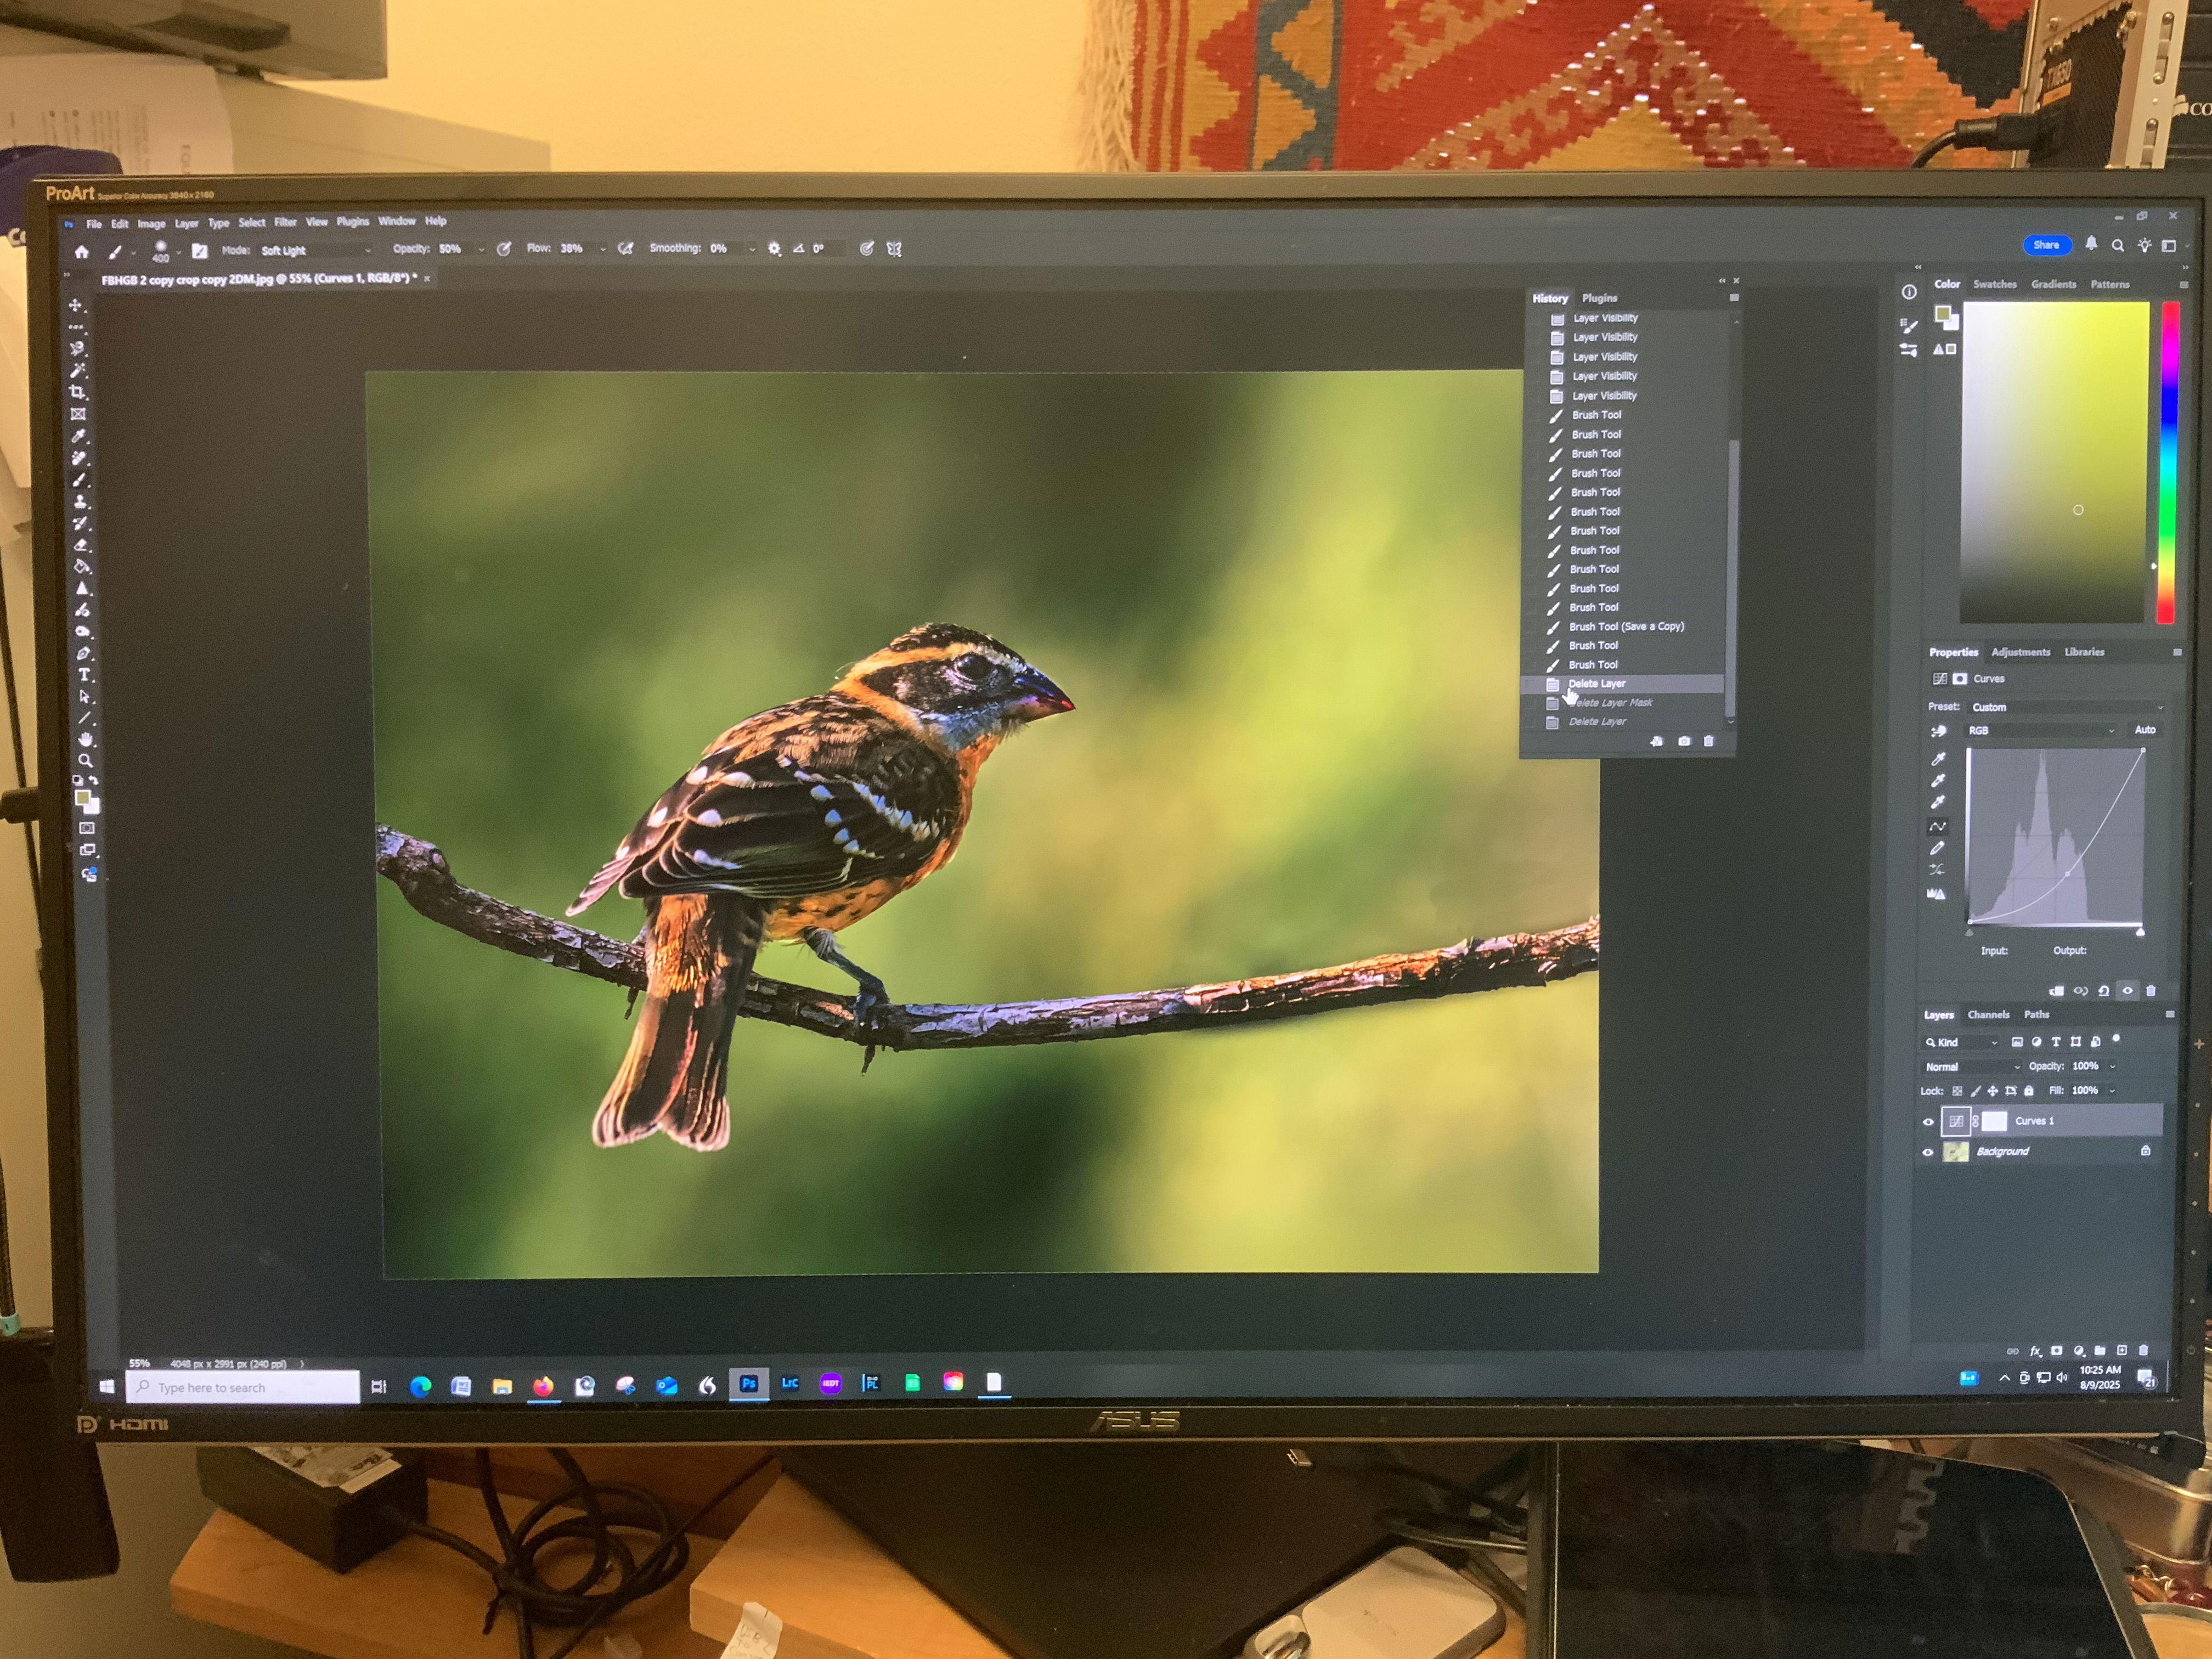
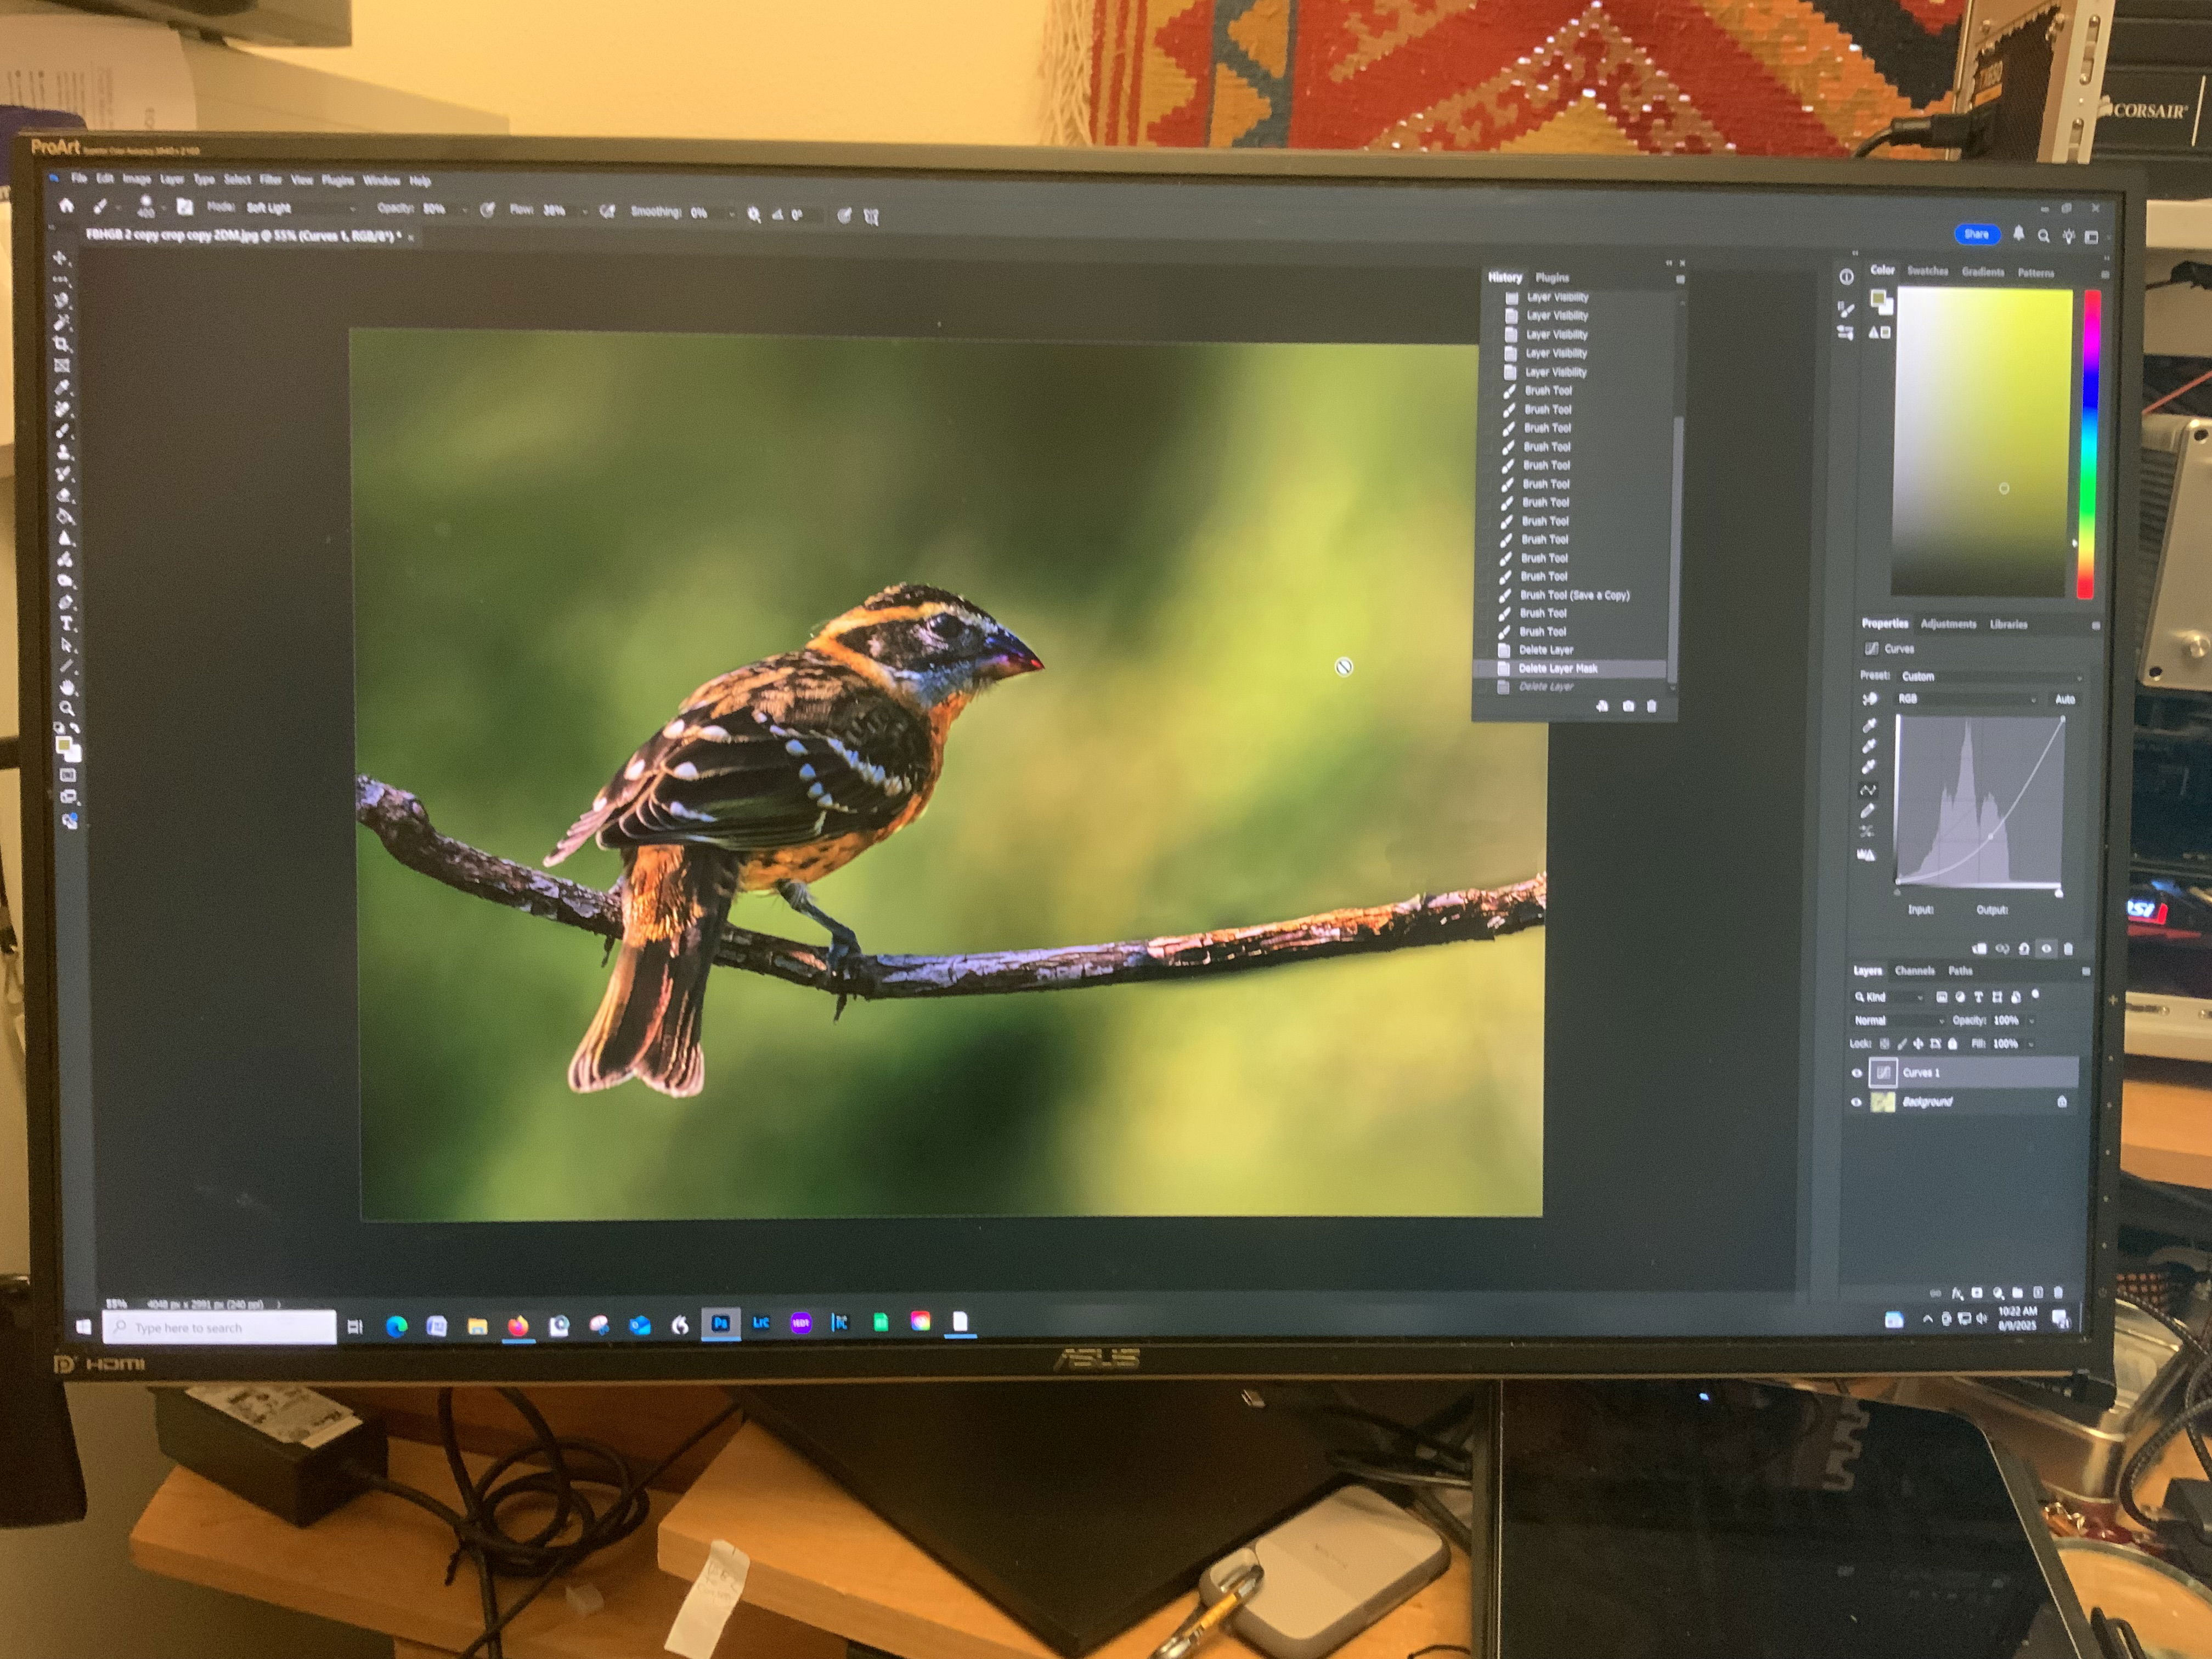
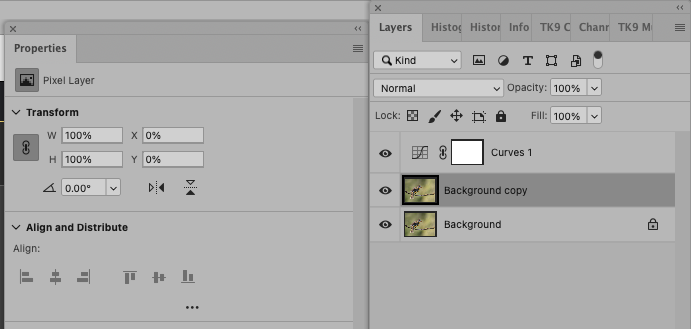
With a ~~50% opaque and softly-feathered brush of appropriate size, sample from a similar-colored/structured area and clone over the edges that need smoothing. To see them better, do a temporary curves or levels adjustment layer above and crank the end in to see it in high contrast. Then clone on the layer below and then delete the curves/levels layer. Here is how your image looks with that visualization.
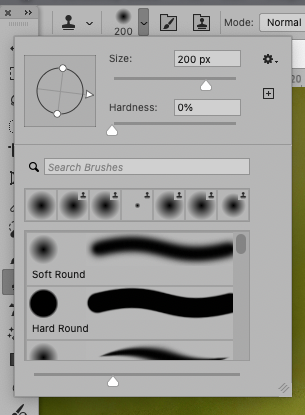
So sample (on the actual pixel layer, not the adjustment layer) from a nearby area and brush over the hard edges above the stick on the right edge until they disappear. Keep the brush fully soft (Hardness 0) – for almost any cloning. That is different from opacity. You can zap the 2 bright spots with 100% opacity or the Remove Tool or Spot Healing Brush.
The first step is getting a good selection of the stick, then you can clone right over it and it won’t be affected.
Repost looks pretty good and most of the cloning artifacts are taken care of in the Repost. I see a dark edge on the top of the stick and the solution has been provided for you in the critiques. Eye, lighting, and comp look pretty good in the Reposted version…Jim
Then choose the clone tool and in the top bar on the screen, click on the fuzzy circle to the right of the tool icon – it shows 200 in the screenshot..
Diane:
Thanks again for all your help with this. As it turns out, there appears to be something wrong with my snap tool. I spent several hours online with the people at Adobe and not a single person could figure it out. All three people I spoke with took control of my computer from their space, wherever that may be and not a single one could come up with an answer.
I’m a little frustrated. I think I have my snap tool settings correct. But drawing with either the lasso tool or the rectangular tool and surrounding the object doesn’t work at all, I can’t get it to work with the image selection tool, but that creates other issues that are not acceptable.
I uninstalled and reinstalled Photoshop several times with no difference. I’m gonna try again tomorrow until I get an answer that’s acceptable. I’m pretty sure I have all the settings correct.
I have been using your suggestion of a soft brush at 50% opacity and that works great. I i’m pretty sure that everything I have on my computer related to Photoshop is up-to-date.
I have two computers that I’m using. One is a desktop with 64 GB of RAM, a high-end processor, a high-end graphics car with 32 MB of RAM,. The desktop is running windows 10 and the laptop, which is an Asus pro art studio book has 32 MB of RAM, fast processor, a fast graphics card and all kinds of bells and whistles.
What is interesting is that I’m unable to run Photoshop on the Laptop, but I can run. A beta version of Photoshop on the laptop. And I haven’t been able to figure out how to run the beta version, not that I want to, on the PC. The laptop runs windows 11 .
What is unusual, is that I have the same problem with snap to issues on both computers. The selection tool will do selections, but that rectangle tool and the lasso tool do nothing on both computers. This is really strange…
Very frustrating! My only thought is that PS is increasingly relying on “borrowing” graphics processor memory. Is your graphics driver up to date? The latest PS specs should show if you need to upgrade it. Or possibly it is a bug unique to some computer configurations, but I would think the Apple people you worked with would have checked both those issues. I hope you find a solution!