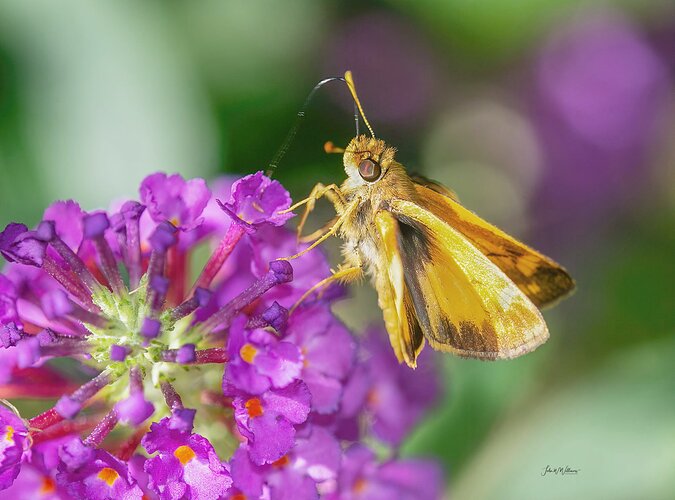
Wonderful sharpness on this little guy and nice composition! I’m wondering about “Photoshop RAW filters.” Was it originally a raw capture? If you first go to PS and then use the alleged “Camera RAW filer” you are not getting nearly the tonal leeway you had if you used the “same” adjustments in the raw converter (ACR, LR or whatever.)
Astonishing sight of that long feeding tube from the skipper to the viburnam. Would never have imagined that without seeing this image. beutiful bokeh background.
Looks like parts of the skipper are blown out and not quite sharp. Try processing the raw in acr and pull Whites until the histogram is safely in bounds. Try PS smart sharpen since Top Sharpen did not quite nail the skipper., but that might be unnecessary if the bright whites are brought down.
Maybe a bit of vignette?
Hi,
Nice image, but brightness is overpowering, especially in highlights. I would tone down the highlights which will improve image quality. Overall, focus is nice and sharp and has a pleasing comp. Well done…,.,Jim
Hi, John. I agree with others that the brightness is a little overpowering, but it’s a terrific image. Nice sharpness and color and good BG. Overall, very nice.
Wayne, I do agree with the others about the brightness. If you are shooting in RAW, you definitely want to edit in a program (ACR, LR, etc.) that allows you to edit the image while it is still “RAW” so that you can take advantage of all the information that was captured in the RAW file. You have a lovely composition and a promising image.
ACR=Adobe Camera Raw.
Hi Diane, Thanks for your comments. I always shoot in RAW, move to LR and then Photoshop. Not sure what “ACR” means as my mind goes numb now and again. . . .
I’m sorry, Wayne, we are so bad at using acronyms these days. I see that Jim has told you that it stands for Adobe Camera Raw. If you are using LR, you are fine. I guess we all got a bit confused with your reference to Photoshop RAW filters. I think we are on the same page now.
The repost (I will add “+Repost” to your title) is better, but still seems like the bright areas are blown out, so I’m not sure if you pulled the exposure highlights back some more in LR, maybe selectively (with the paint brush) would help. My guess is that you took it mid day, and the light was just too harsh. I wish I could help you, as I do like the composition, and the way he is positioned.
Thanks Shirley, The mid day shot just made it difficult for me to tone down the bright light spots.
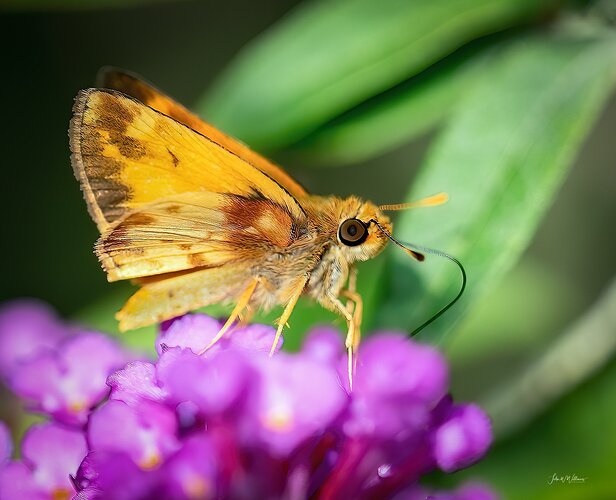
Repost 2 Another shot with less bright sun light.
This Fiery Skipper Moth has natural high tones and that is what attracted me to him.Wayne, the tight look as this little skipper looks good, especially with the detail in the flowers of the first post. The initial shot looks slightly overexposed, with the bright whites turning gray as you burn-in the highlights. If you reduce the whites and highlights in LR, you can often darken overly bright areas without them turning gray, depending, of course, on the exposure. If they’re too bright , there’s no fix. The tonality in the second post is much better.
John Wayne: Good look at this little guy and an especially good capture of the eye. The repost is a nice improvement. BTW, the filters in ACR and LR are identical so there is no advantage to using one workflow over another. I do almost all of my initial adjustments in LR and generally use Photoshop for finishing touches and sizing. >=))>
Tonalities in Repost 2 are much more under control. Bright sun can be a handicap. A diffusion filter is great but would probably spook a subject like this and needs 3-4 hands unless you are on a tripod. Sometimes you can use your own shadow. When nothing else is possible, shooting an HDR set can work well. If there isn’t movement, the Photo > Photo Merge > HDR feature in LR can be amazing. But I find I need to set it to a spread of 2 stops or more, as 1 stop on either side of the middle just matches what I can do with the middle exposure with the Highights and Shadows sliders.
Thanks to all. I feel blessed at your attention to my post. I usually do post editing in Lightroom as Bill does but recently skipped to "camera RAW filter " in Photoshop as those tools are similar to LR, however, my post edits will return to LR as my initial edits. Will check out Diane’s HDR process also.
I love this butterfly John Wayne, you did well with the adjustments. Its a wonderful capture
Dick Knudson, I think somehow you made your comment on John Wayne’s photo instead of yours. I am not exactly sure how you move a comment.


